
Step-By-Step: How To Add Google Maps Saved Lists On The App or On Desktop or In a web Browser
How To Set Up Custom Google Maps Saved Lists On Desktop Or In A Web Browser
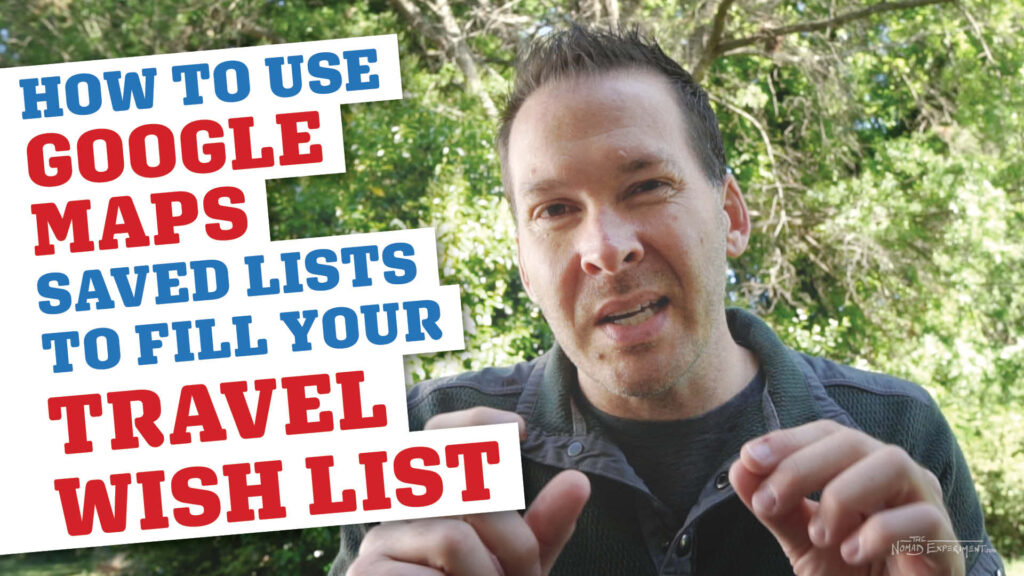
Google Maps custom saved lists are awesome for storing away travel destinations for a future trip! Setting up Google Maps saved lists on a desktop or in a browser window is a little different than doing it in the app or on a phone or device.
Of course, software and sites change from time to time, but these steps should translate regardless. Want to know my thinking behind why Google Maps saved lists are so powerful for me? Watch this quick 3-minute ditty by yours truly!
Creating Custom Google Maps Saved Travel Wish Lists On Desktop Or In A Browser Window
Notice that below all of these instructions on how to set up Google Maps saved lists there are images to help you follow along! Note that I was using the Chrome Web Browser, but again, it should be the same in most.
1. Make sure you’re logged into your account. In Google Maps, or anytime you’re in Google’s space, you can’t really save stuff or view your saved stuff unless you’re logged in! Typically your avatar will show up in the upper right-hand side of the browser window if you’re logged in, assuming you have selected one.
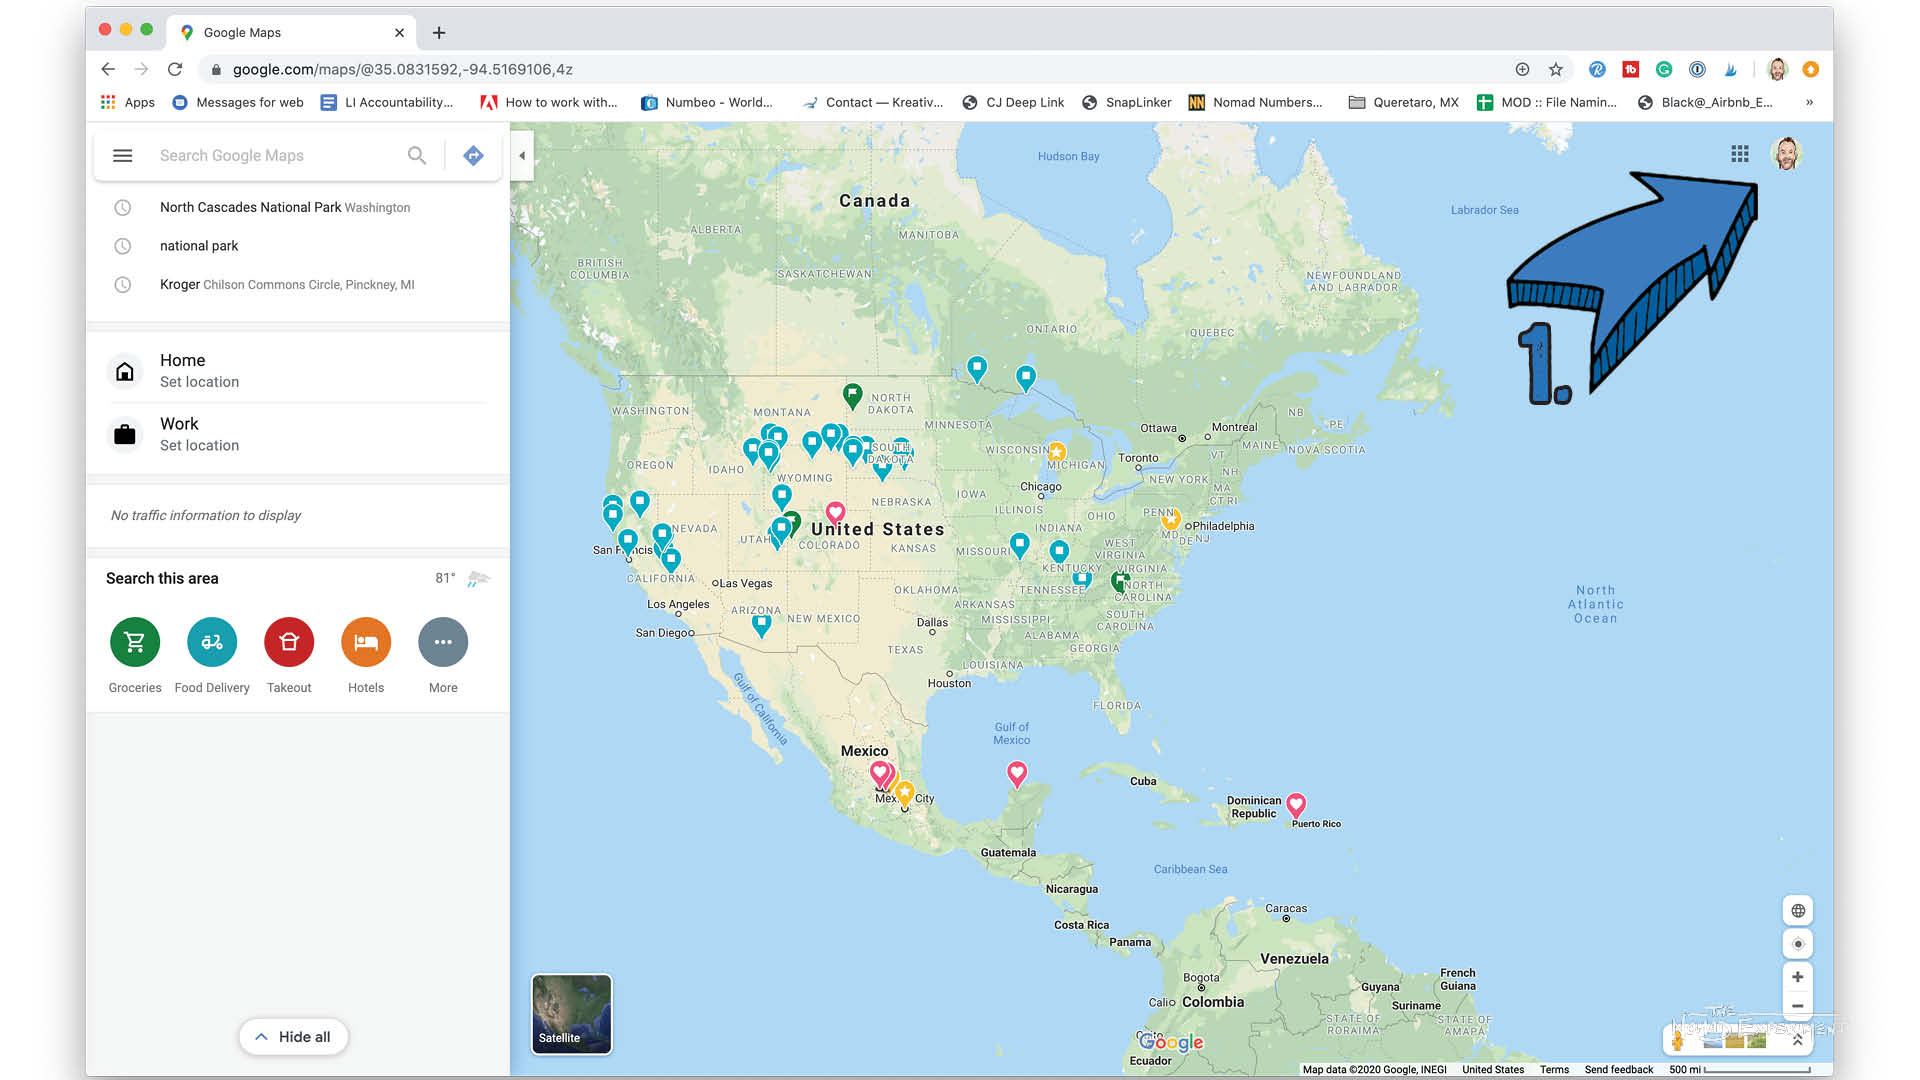
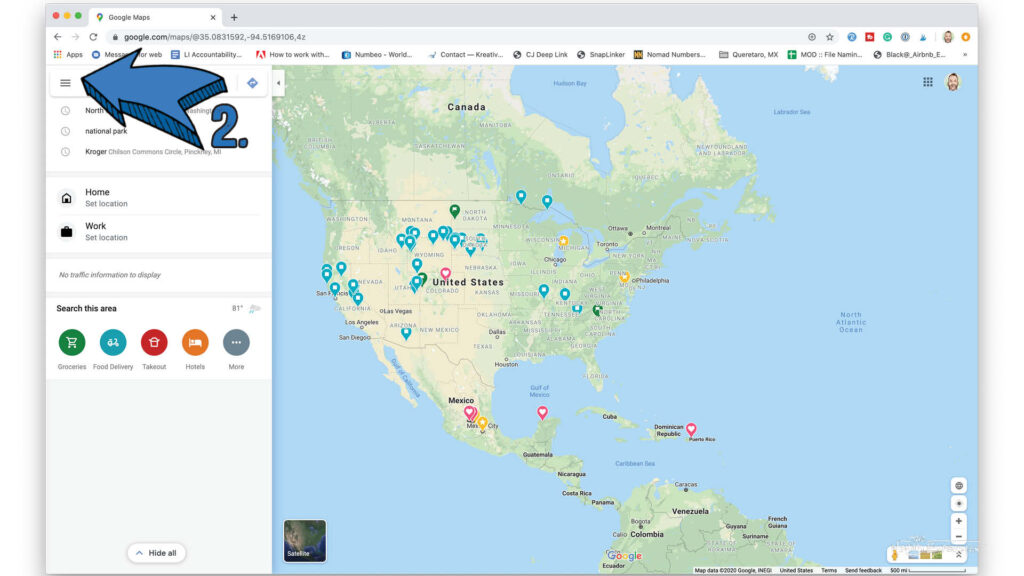
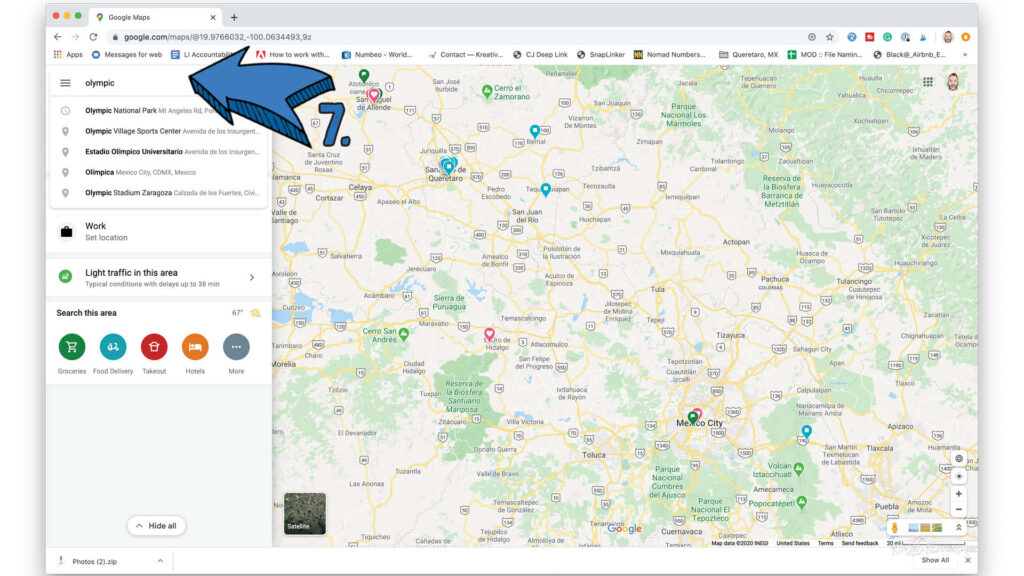
2. Tap on the three menu lines at the top left of your google maps browser window.
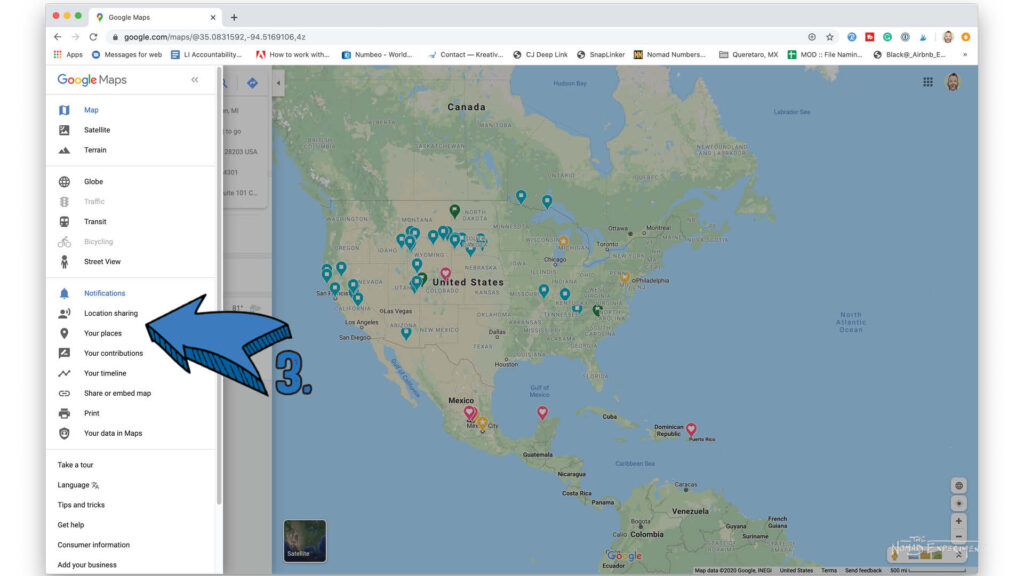
3. Select “Your Places” on the list.
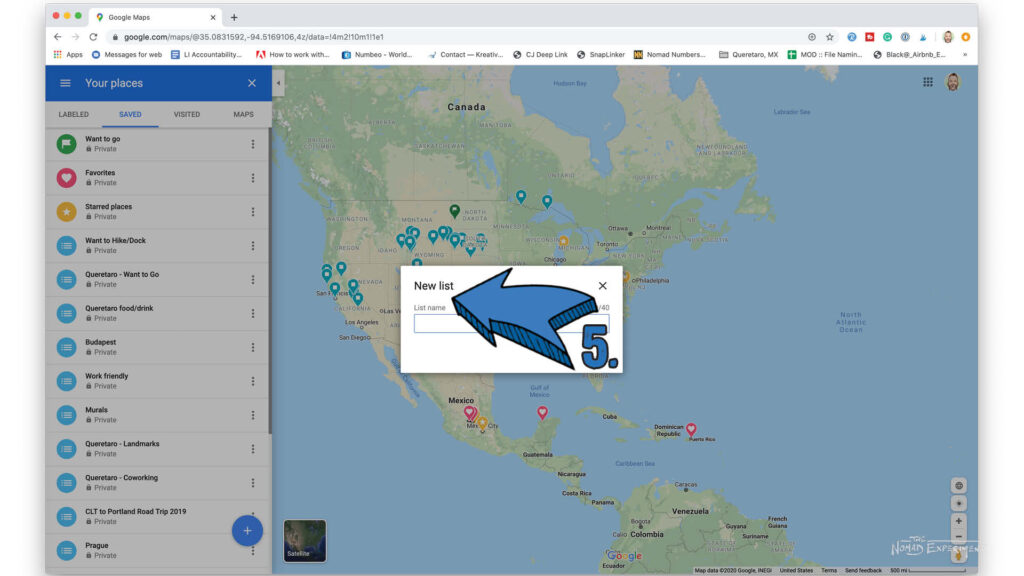
4. Make sure “Saved” lists are selected at the top of the google maps saved lists…list. Then click the plus (+) sign at the bottom of the list/browser window.

5. Name your new saved list, add a description, then close this browser subscreen by hitting the “X.”
Google Maps Wish List And Saved Lists Tip: What To Call Your Lists?
I’m a huge nerd when it comes to organizing, and Google Maps is a bit tricky when it comes to this. Unfortunately, at this point, Google hasn’t created a folder or organizational system available for Google Maps lists…at least that I know of! So for me, a few best practices will help as you start so that as your plethora of lists grow they don’t get out of control…


A. Label Your Saved General Lists, well, generally.
For instance, using “Eastern Europe” or “Western Europe” will likely do.
B. Label Your Saved Specific Lists more, well, specifically.
But start with an over-arching Them. For instance, I have multiple Queretaro lists that I wanted to explore because my single list wasn’t specific enough when I was living there. I created:
- Queretaro – Food Want To Go
- Queretaro – Landmarks Want to Go
- Queretaro – Coworking / Possible Work Spots Want to Go
But be careful! Since you can’t organize it into folders or anything, it can get out of hand quickly!

6. IMPORTANT: Make sure to hit the three verticle dots next to your new saved list in the browser window and choose your privacy settings! Choose whether the Google Maps list is Private, Shared, or Public. We all know that Google Maps, and Google in general, track your every move if you let them. You can keep all your stuff private here if you want, or even just share a list with a friend or two. That’s really good for travel planning or co-creating trips with someone else.
7. Now that your new list is created, go back to the Google Maps search screen and search for a cool place! Might I suggest “The Wormhole” on the Aran Isles in Ireland, or Vienna, Austria, or maybe even a church completely covered in Bones outside of Prague!?
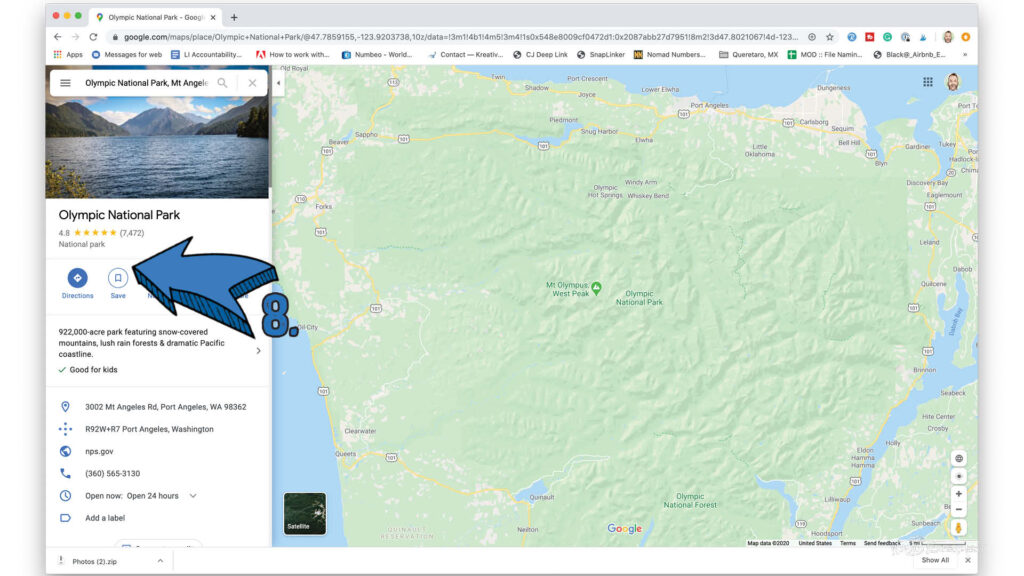
8. When you’re viewing this new, cool place’s details, click on the “Save” icon on the left of the browser window.
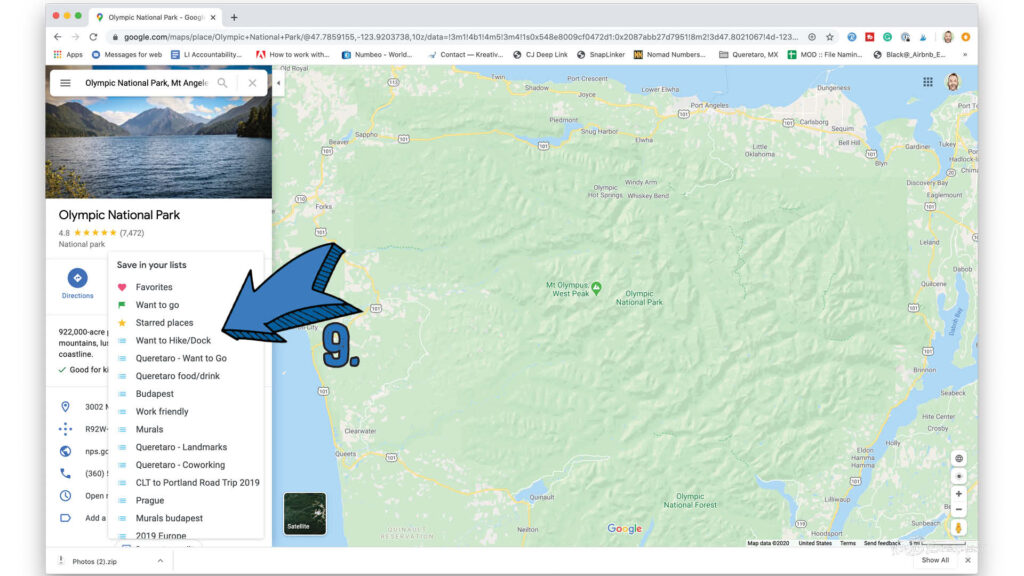
9. Select the list that you want to add the destination to on the menu of your Google Maps saved lists. You can add to multiple lists if you want to. Simply click the “Saved” icon again and select another list, but be careful! You may want to just be a little more calculated about your list creation if you feel yourself inclined to add to more than one or two saved lists! (See more tips with regards to this after the instructions!)
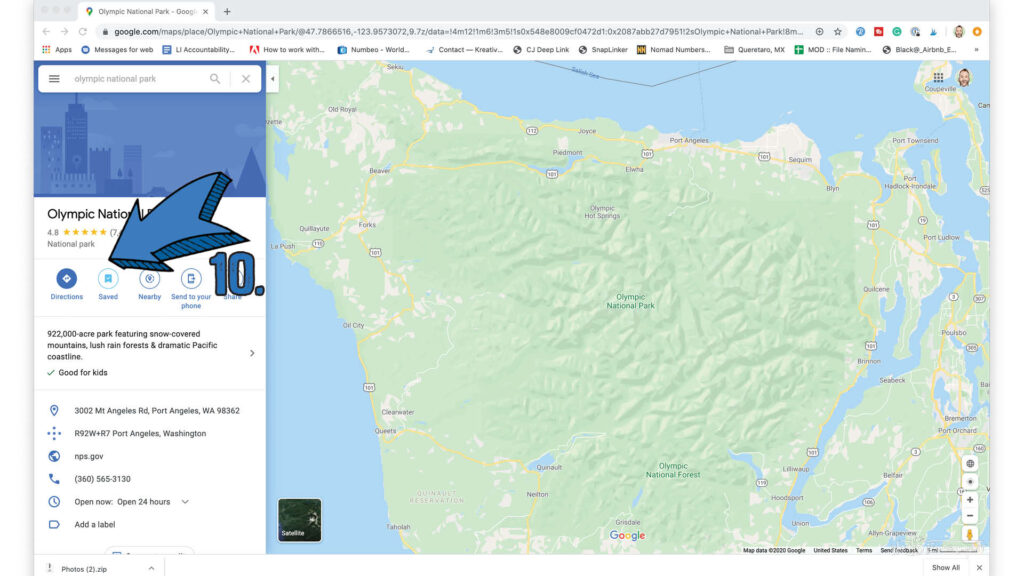
10. Back on the details screen you’ll see that the “Saved” icon is now highlighted! If you’ve added the destination to more than one list, the number of lists it’s on will be in parenthesis.
More Google Maps Saved List Tips
Google Maps Lists and Saved Places Tip: Add Notes with Names!
I’m a huge fan of learning the names of people when I can, even though I’m terrible at remembering them. So I put them in my phone on my saved place info/notes section! Literally, the moment you meet someone at the amazing new restaurant or spot you visit, drop their name in the notes section so the next time you’re there you can call them by name!


Google Maps Saved Lists “Favorites” Tip
Once you’ve finally visited one of the places on your handy dandy new saved places list, what do you do now? Well, you no longer “want to go”, so it needs to come off of that list! Simply go back into the detail screen and tap the “saved” button again and uncheck on any lists you want to remove it from.
Here’s where your default favorites list in Google Maps comes in. If the place passes muster as a place you love and want to go back to, tap on the “Favorites” check box and it will live there as long as you want! The next time you don’t feel like exploring a new spot, just click on your list of favorites and pick from it!
Time To Fill Your Saved Lists With Some Travel Wanderlusty Awesome Destinations!
Hope this little Google Maps How-To helped! Holler at me over on Facebook and let me know what cool travel destinations you’re adding to your new lists. Or check out some more travel destination inspiration here!
Cheers!
— Jason

About Jason Robinson
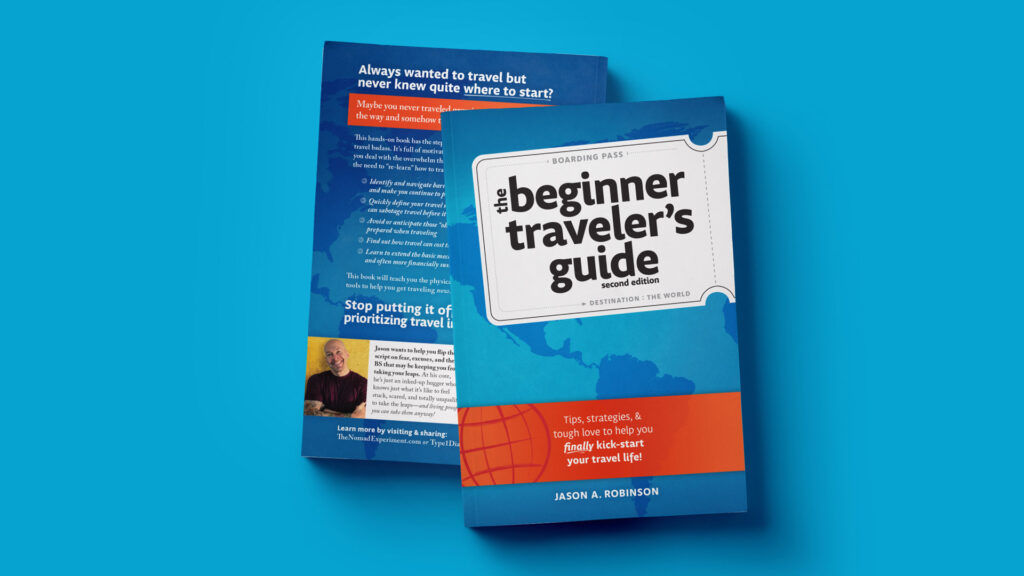
Jason is the author of “The Beginner Traveler’s Guide” as well as the voice behind the words and the eye behind the lens for The Nomad Experiment. “Planning to travel at some point” wasn’t actually getting the job done, so nearing 40 he decided to make it a priority, nomatter how scary that was. A few years later—through the pandemic and a type 1 diabetes diagnosis at age 42—now living a life of nomadic travel, he’s speaking out to encourage others of any age, or with any serious medical diagnosis, to live an unconventional life.
Travel Planning Tips
Figure out where you are going & how are you getting there…
I suggest using at least 2 to 3 different travel search sites. Start with Skyscanner or Orbitz or Booking …or whatever aggregator site you prefer. Then when you see what airlines to use, check their respective sites for better deals or rewards flights.
Figure out where you’re going to stay…
If you’re interested in hostels, search Hostelworld or Hostelling International. For longer-term or more private digs, look at Airbnb, VRBO, colivings, or you can look for hotel rooms in the links from the search engines listed above.
Get comprehensive travel insurance, or in the least, travel medical insurance if internationally…
Especially with COVID not going anywhere, you need travel medical insurance nomatter what! Start with an insurance aggregator or with SafetyWing, World Nomads, or another. Then decide what is important to you; trip cancellation, baggage coverage, medical, or all of the above. And get a yearly evacuation plan, since you’ll have to get home after your emergency!
Need more resources? Click here!
2 Comments
Comments are closed.