DIY: Build A Custom Jeep Wrangler or SUV Roof Rack Tarp System… For Under $75
How To Build A $75 Custom Jeep Wrangler or SUV Roof Rack Awning or Tarp System
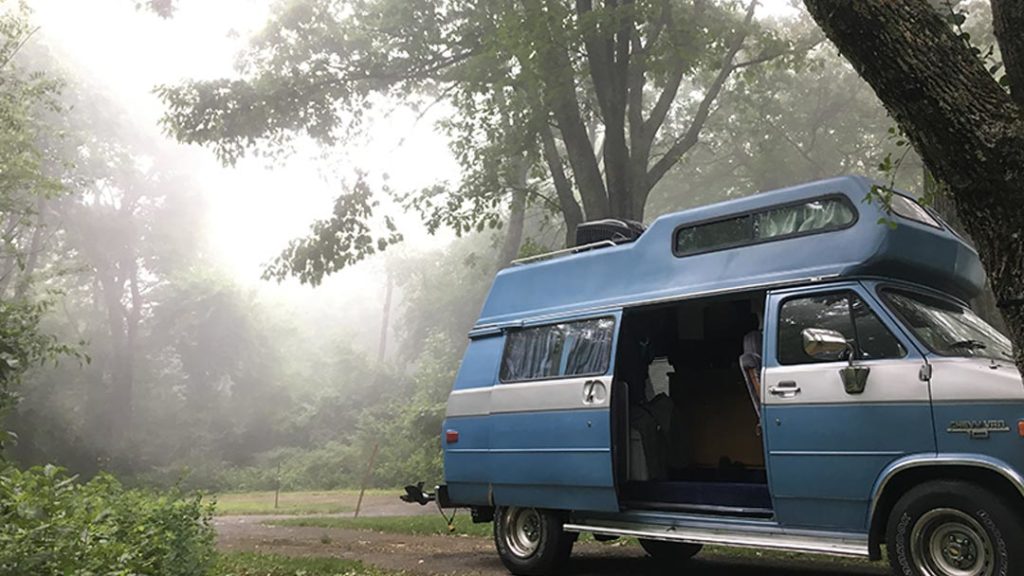
I recently did some serious overloading in my 4-Door Jeep Wrangler JKU. I hit National Parks, boondocked in National Forests, and the whole time slept on my Jeep. (Here’s the newest bed build for my Jeep Wrangler.)
But I was missing some shelter on those rainy and dreary days.
I decided a roof rack awning might be the way to go…but aftermarkets are hella-expensive!
So I decided to build one! Here are all the little details to get you started building your own Jeep Wrangler…or any vehicle with a roof rack really…DIY roof rack tarp or awning mount.

Hi I’m Jason!
I didn’t even see my 3rd country until age 40, then I was diagnosed with type 1 diabetes at 42…in the middle of Covid. This is where I share personal stories, deep thoughts, and travel shenanigans to encourage and empower others with a fear of travel, or of traveling with major medical conditions, to push through and live an unconventional life!

This site participates in the Amazon Services LLC Associates Program and other affiliate programs and may earn from qualifying purchases.
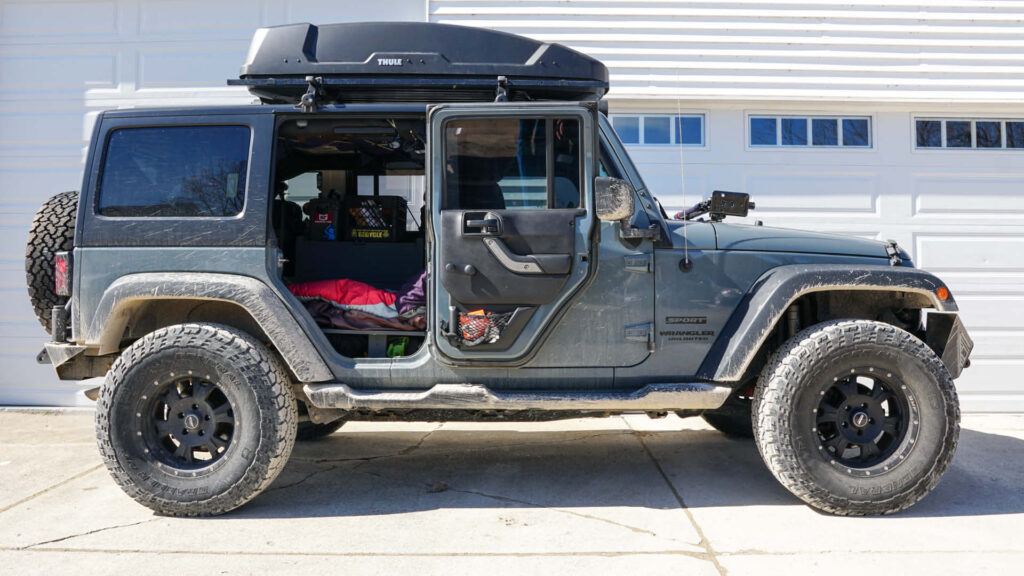
What Kind Of Jeep Wrangler Jeep This Was Built For
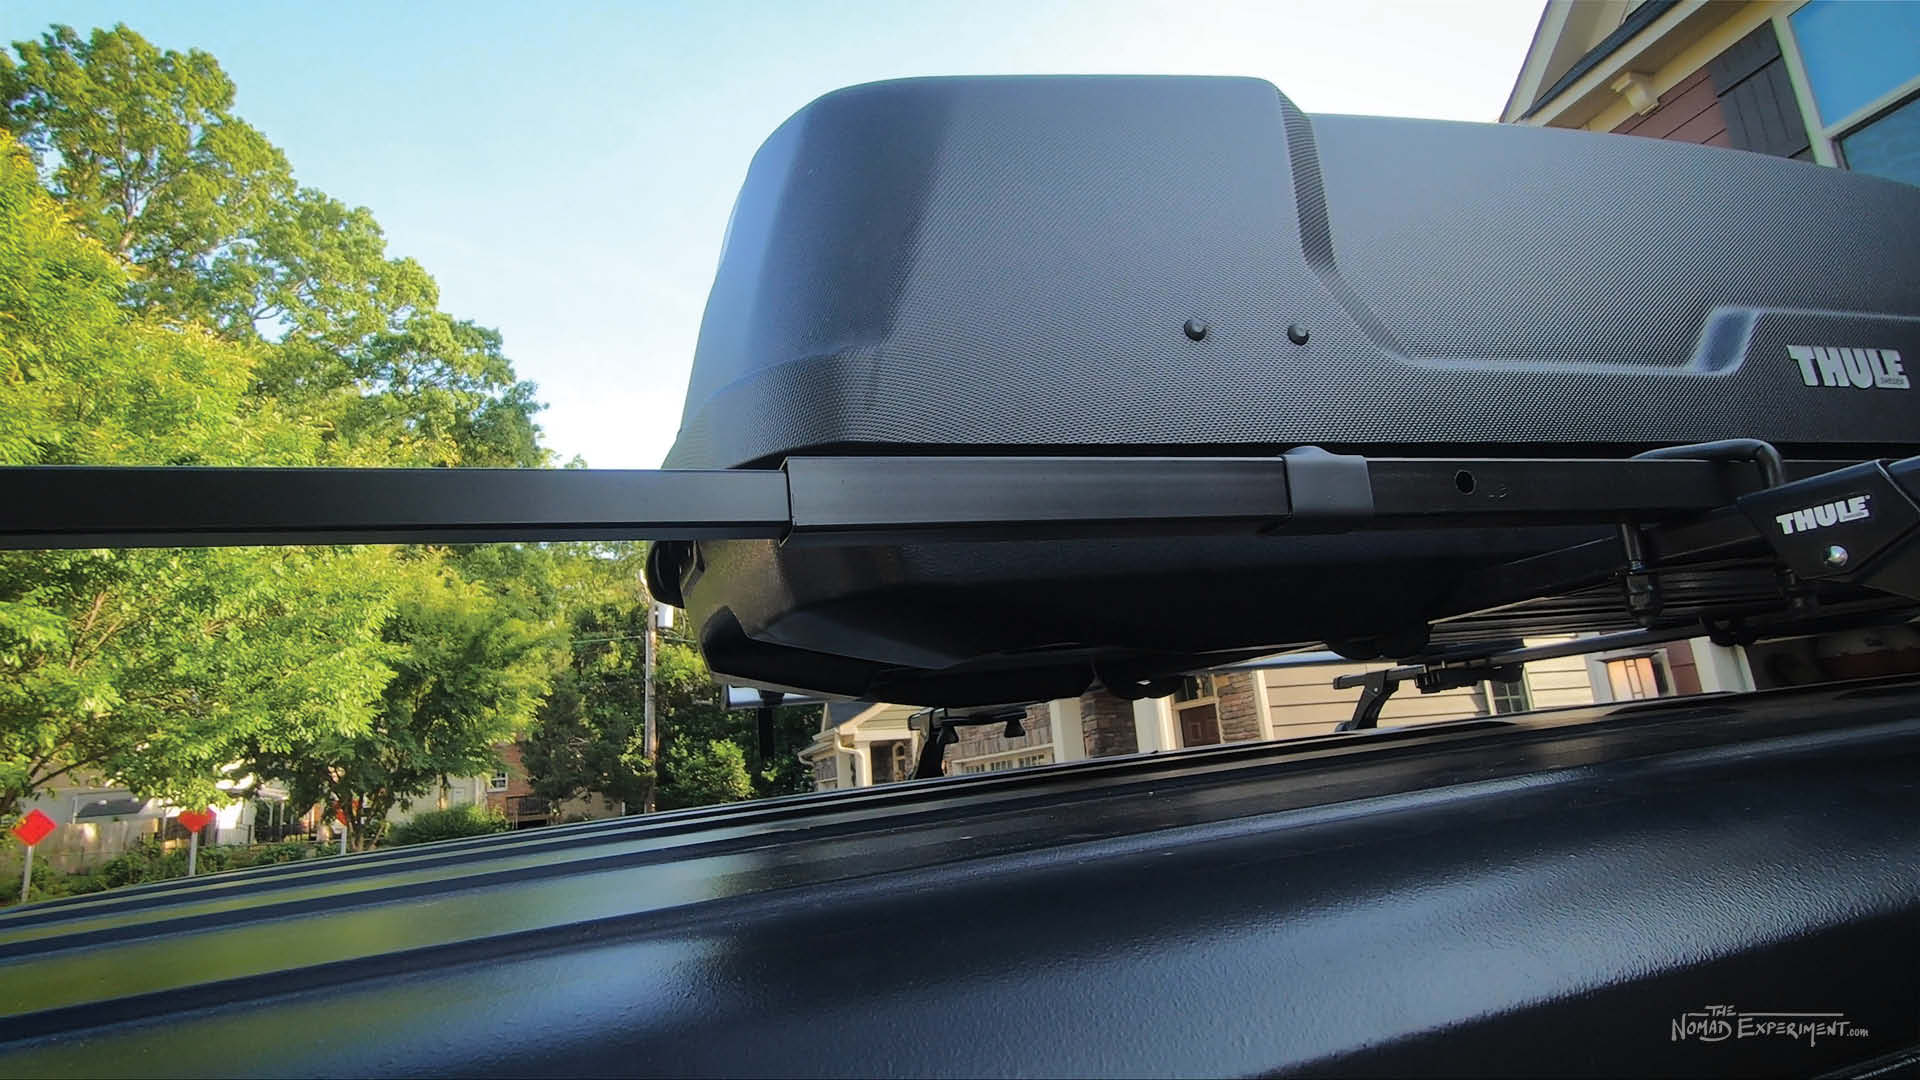
First things first, I’m running a 2015 Jeep Wrangler JKU. I have the Thule roof rack system with the square bars and Rapid Gutter Foot Packs. But this DIY awning or tarp system should work for just about any vehicle with decent clearance.
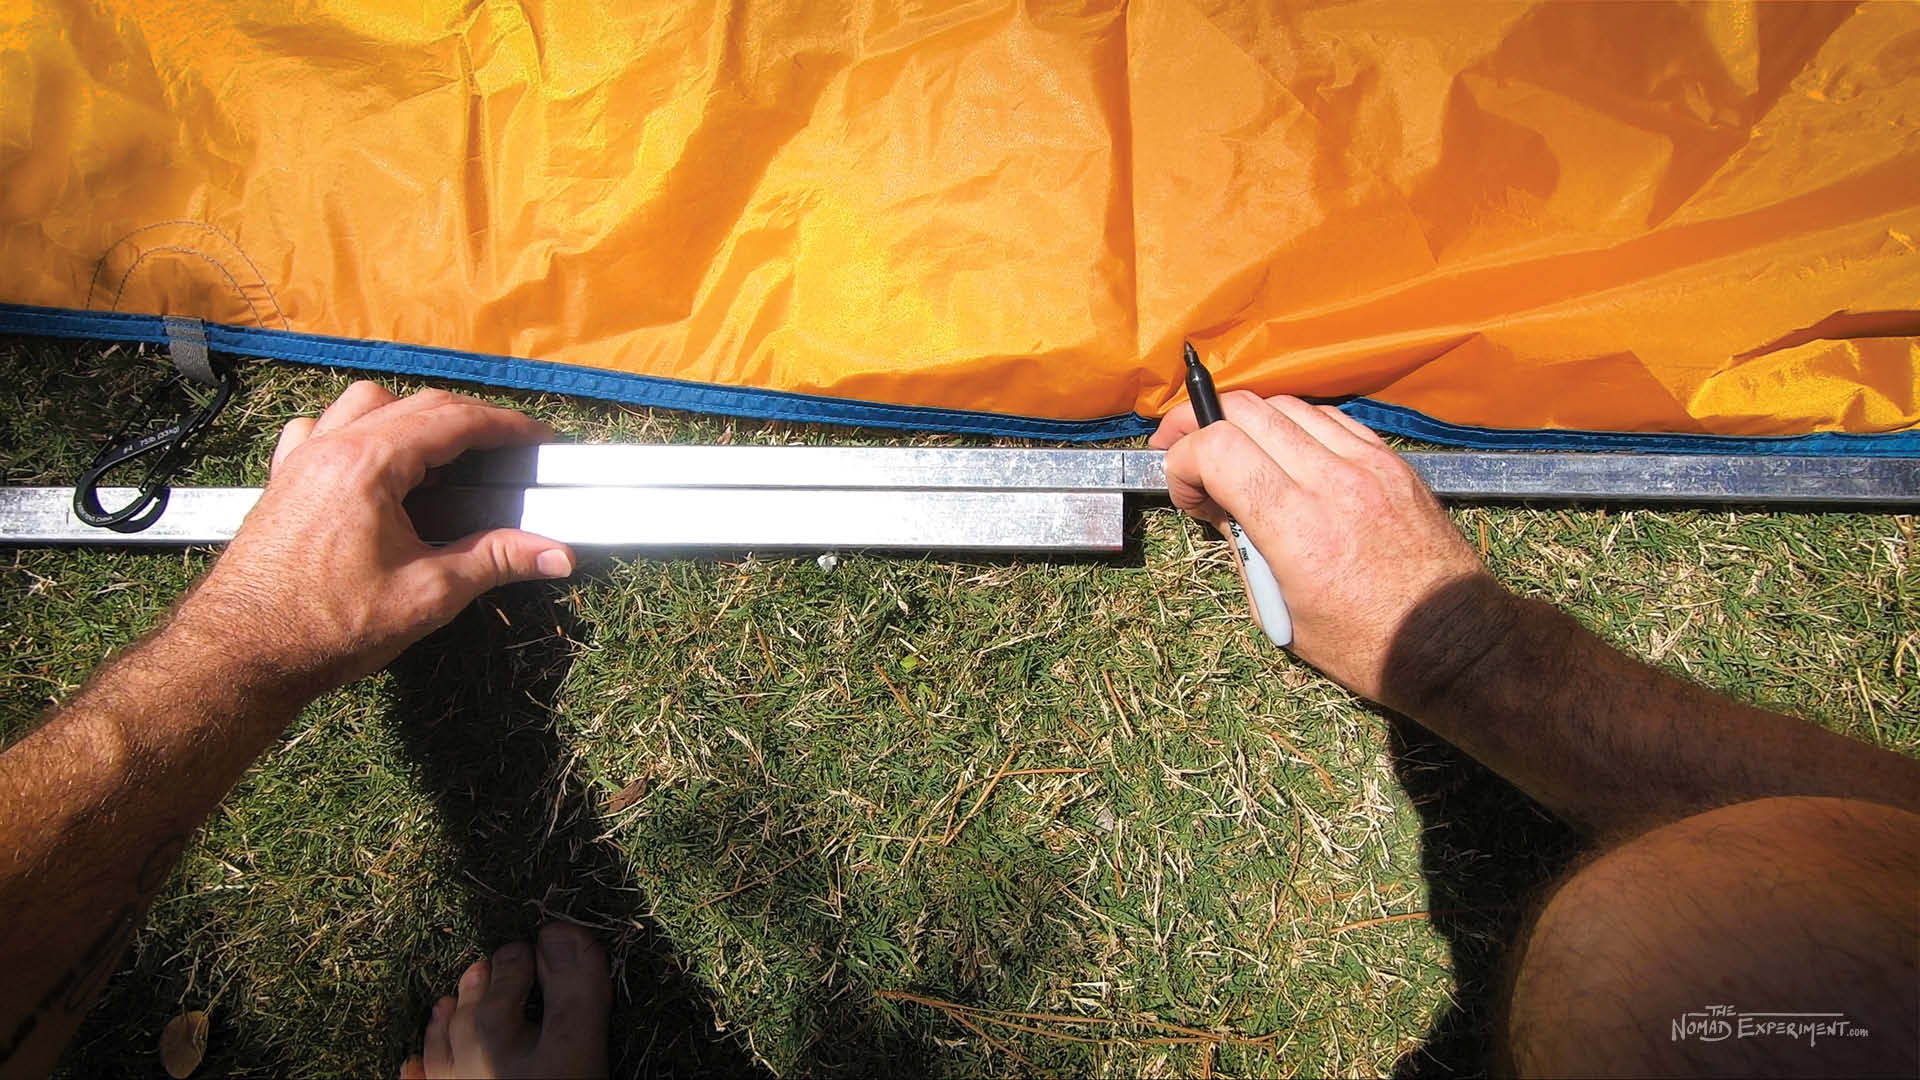
This DIY Jeep roof rack tarp system has a 6′ main bar that stays attached to my Jeep Wrangler roof rack and two telescoping 3′ bars that simply slide into the end. Those end bars are measured with a stopper bolt to the width of my Kelty Noah’s Tarp grommets.
***Want to go straight to the goods I’m running or recommend for Jeep Life? Click Here!***
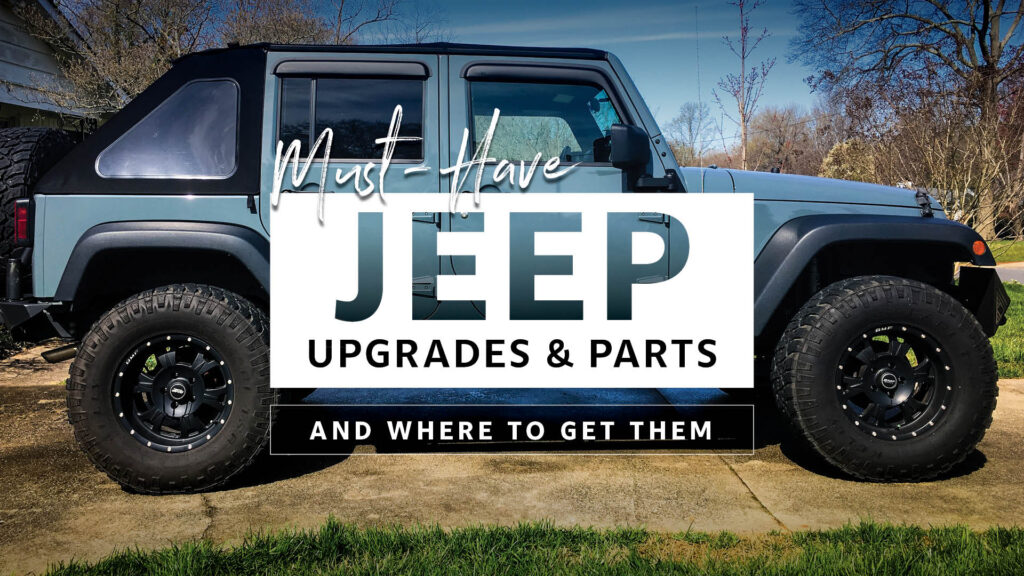
READ NEXT: Jeep Wrangler Upgrades & Accessories to Make Your Jeep Life Fun as Hell!
Second, you’ll need to use these instructions just as a basis of reference! Make sure to read them all before digging in, especially the extra tips I have at the end.
When you DIY, I really suggest you take all of your own specific measurements, etc., and make this custom to your rig! Your U-bolts, lengths, etc., should be double-checked and adjusted as needed. Just use this as a starting place!


Third. These instructions and this installation are all at your own risk! Make sure your roof rack can handle it and that you’re not voiding any warranties or weirdness like that!
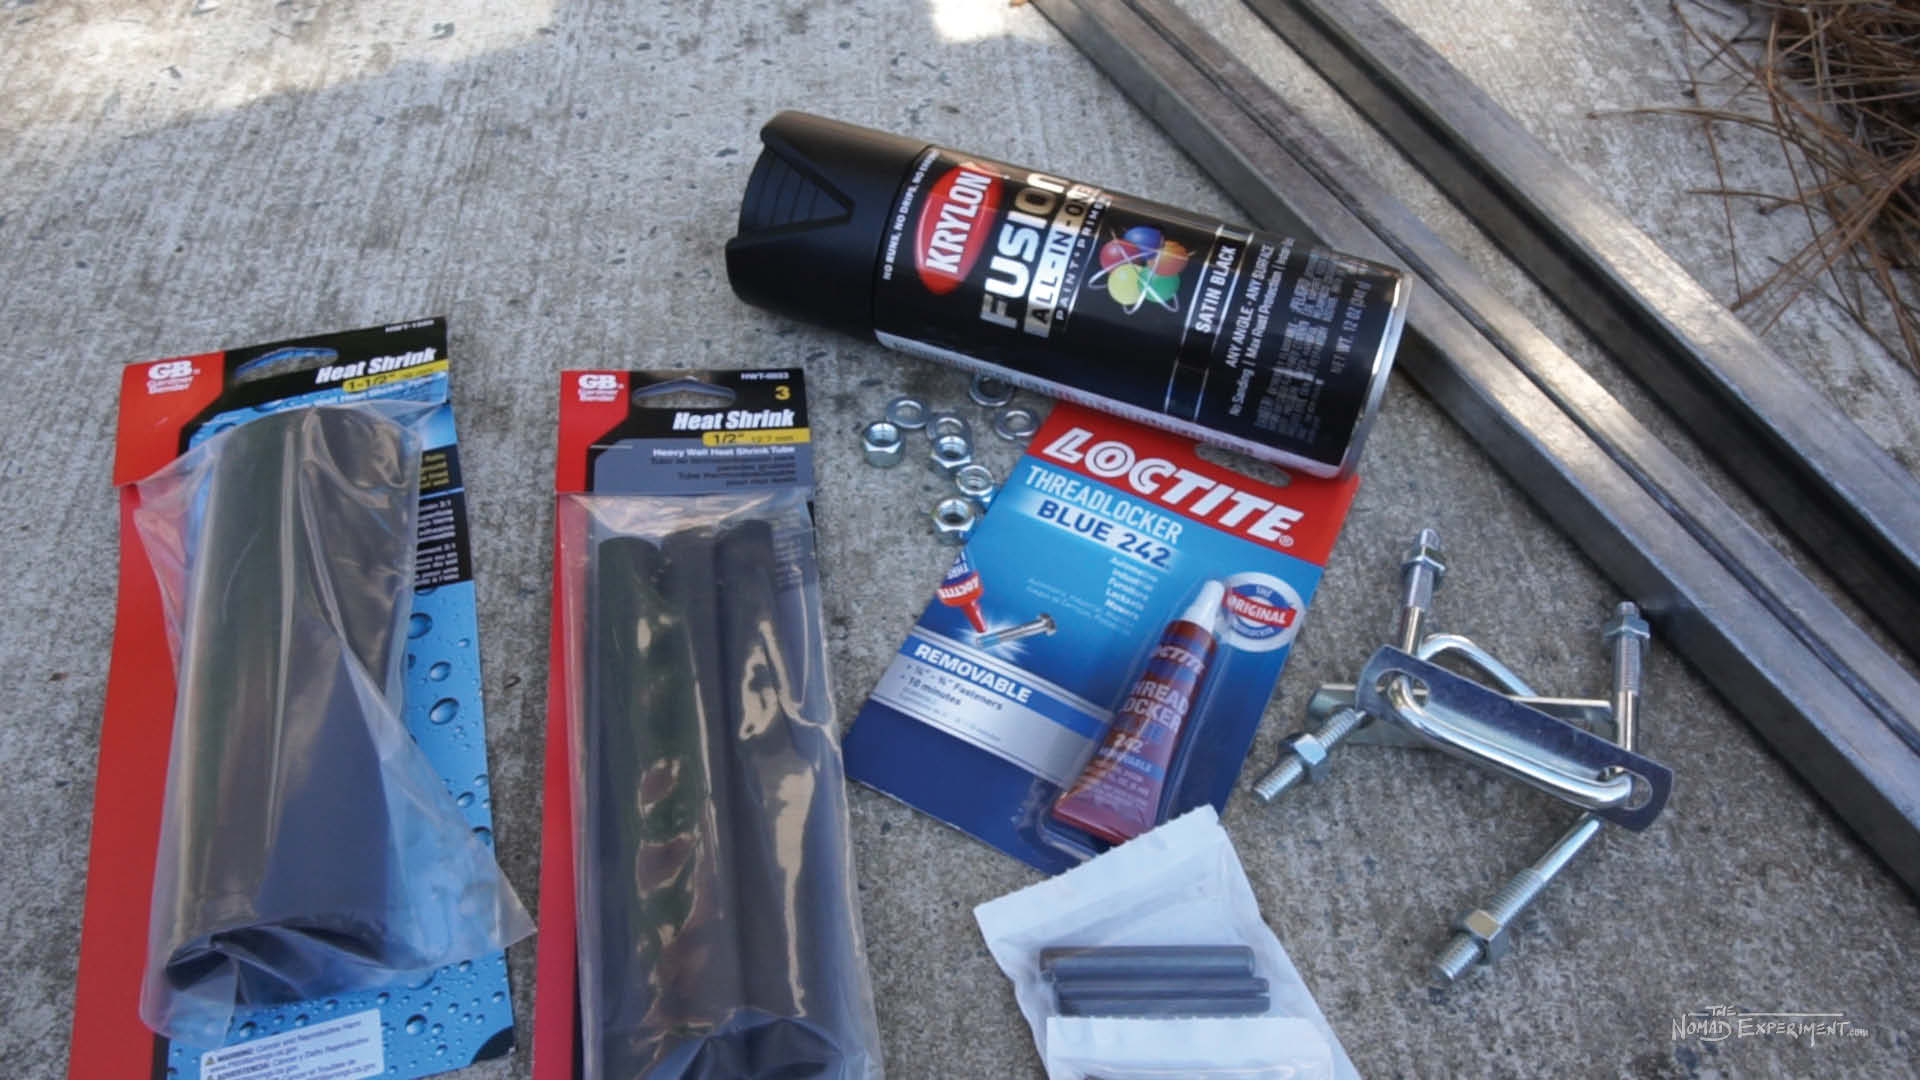
Parts & Tools Needed To Build This Custom DIY Roof Rack Awning / Tarp System:
Here’s a parts list of what I used with this awning system and some links if you need them
1 – 1″ x 1″ x 6′ extruded steel square tube
2 – .75″ x .75″ x 3′ extruded steel square tubes
2 – 2″ x 3″ U-bolts with nuts and connection plate (should be sold as a set)
1 pack – 3/4″ Black polyolefin heat shrink tubing (I used about 9″ of this, total)
1 pack – 1.5″ Black polyolefin heat shrink tubing (I used about 3″ of this, total)
4 & 4 – Nylon lock nuts and washers that fit U-Bolts
Loctite or similar for extra tough connections
1 Can – Black matte spray paint & primer
Tools You’ll Need For Building This DIY Jeep / SUV Roof Rack Awning System:
– Sockets and/or wrenches that match whatever bolt you end up buying
– Heat Gun for heat shrink wrap
– blade or knife for trimming off extra heat shrink
– Beer. (Optional but recommended.)
Optional Items I Used & Recommend:
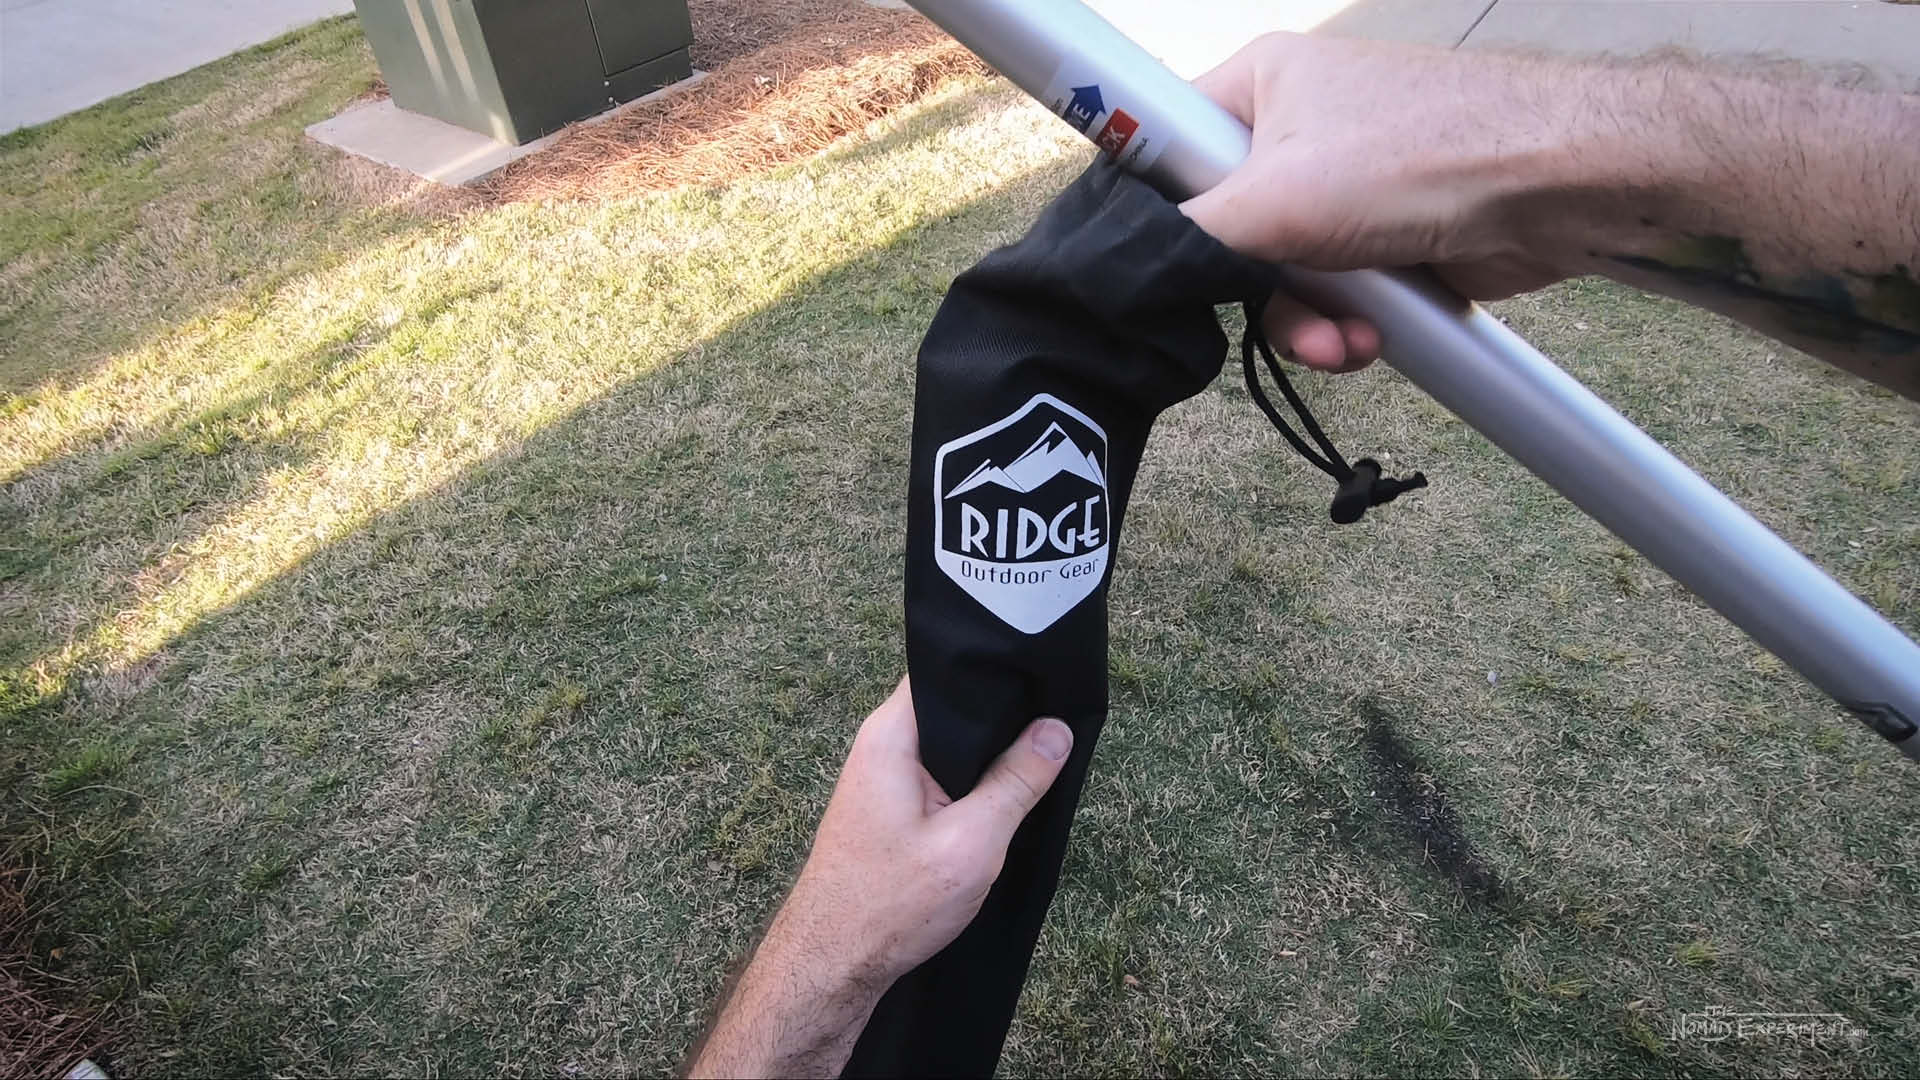
Kelty Noah’s Tarp 9′ – I have owned the 16′, and currently own a 12′ and a 9′. The 9′ was what I used for this awning system, but the 12′ will work too, assuming the extra is just connected off to a tree or something.
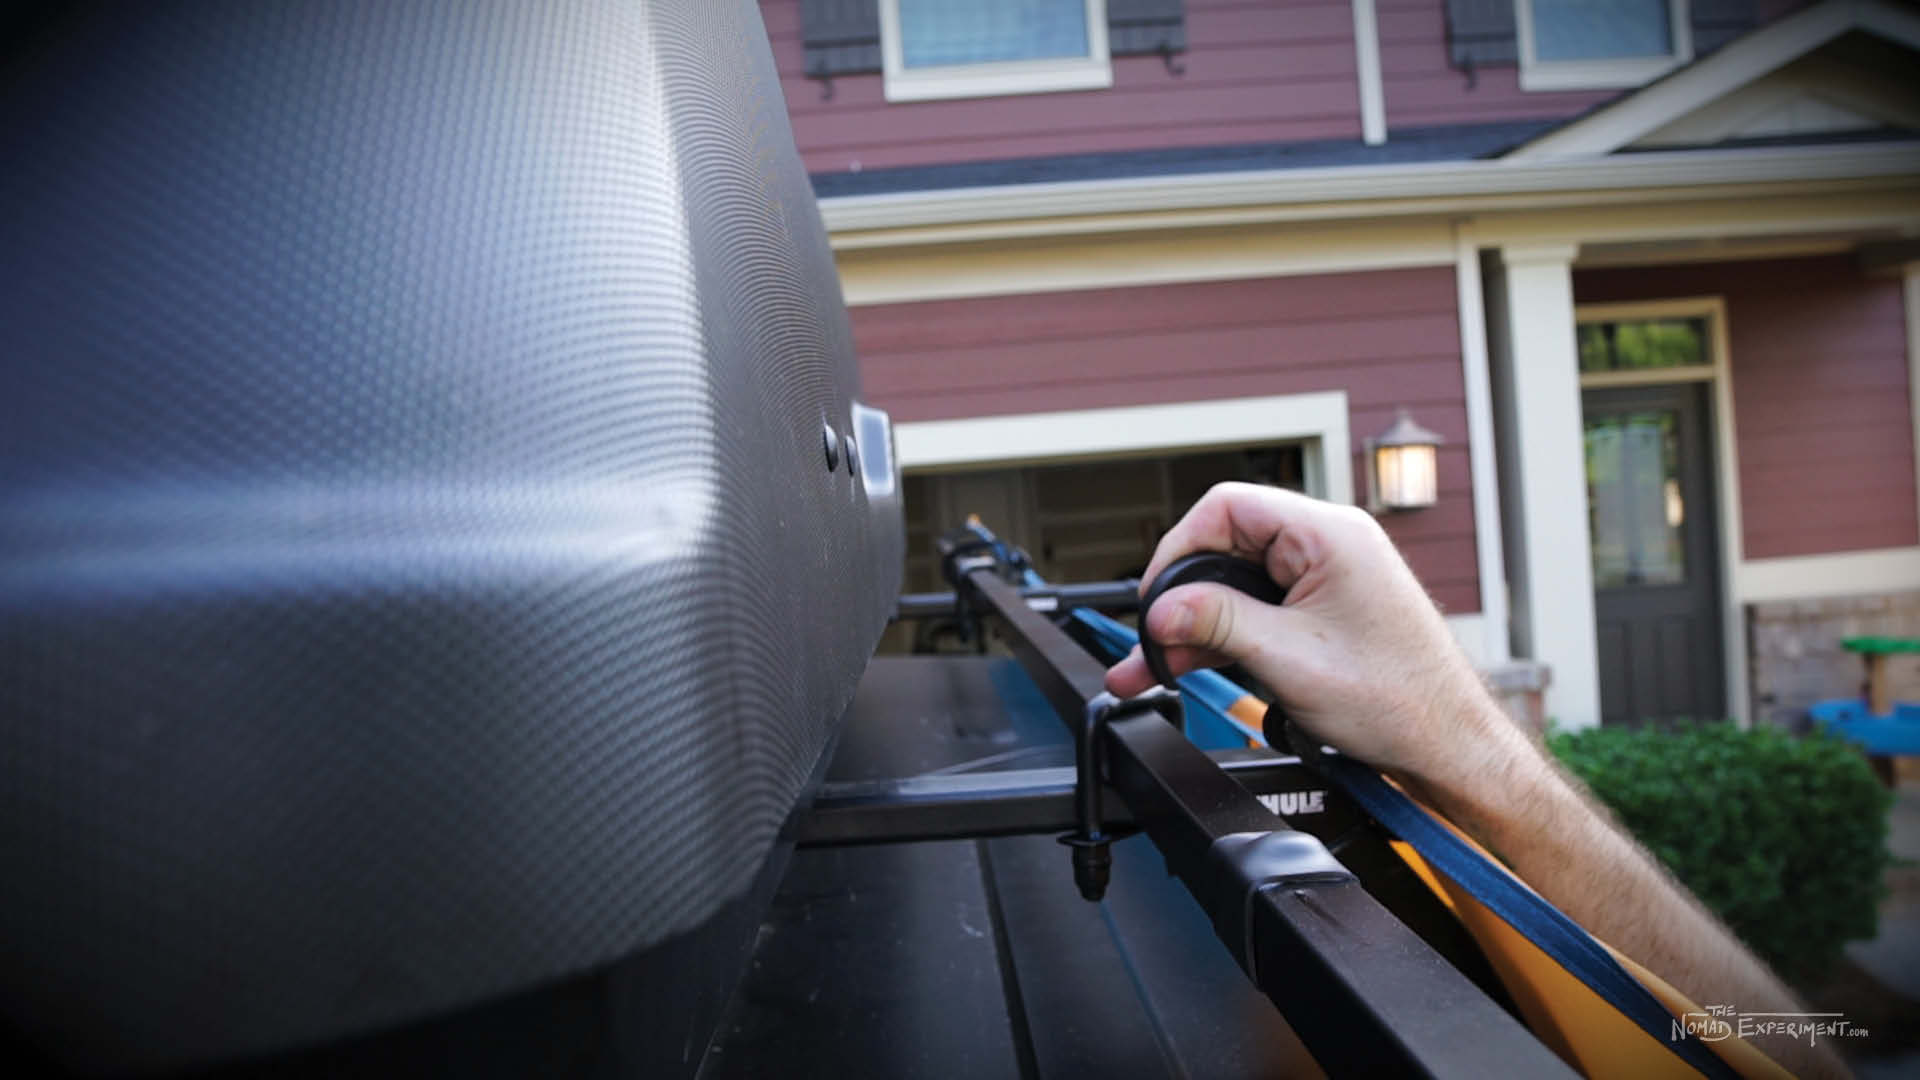
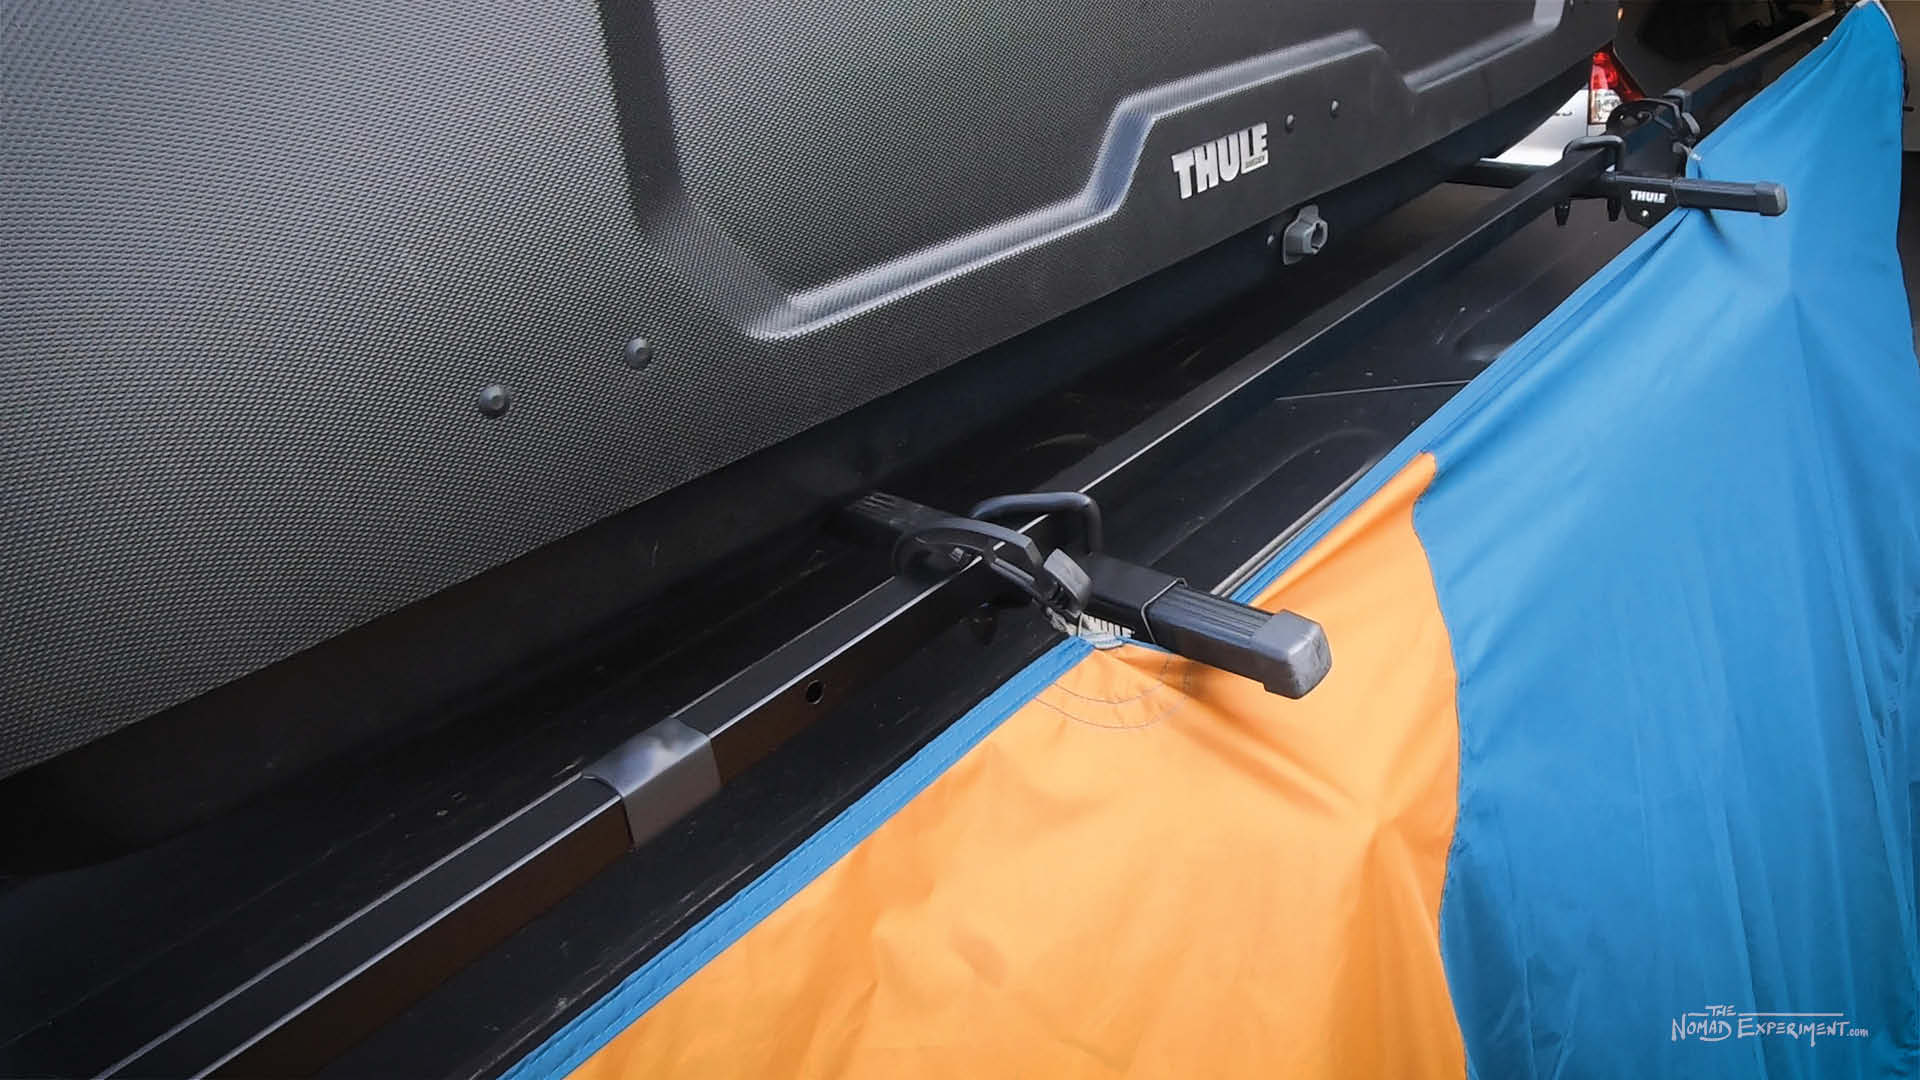
S-Biners – I used these on the ends to connect, but you could use any hooks, bungee cords, etc. if you have them around. But these S-biners come in handy all over the place in my world.
Aluminum Extension Poles – Always handy in general, but especially when tarping when no trees or around or creating a high point within a tarp setup.
Here are a couple other Jeep accessories I’m running and recommend:
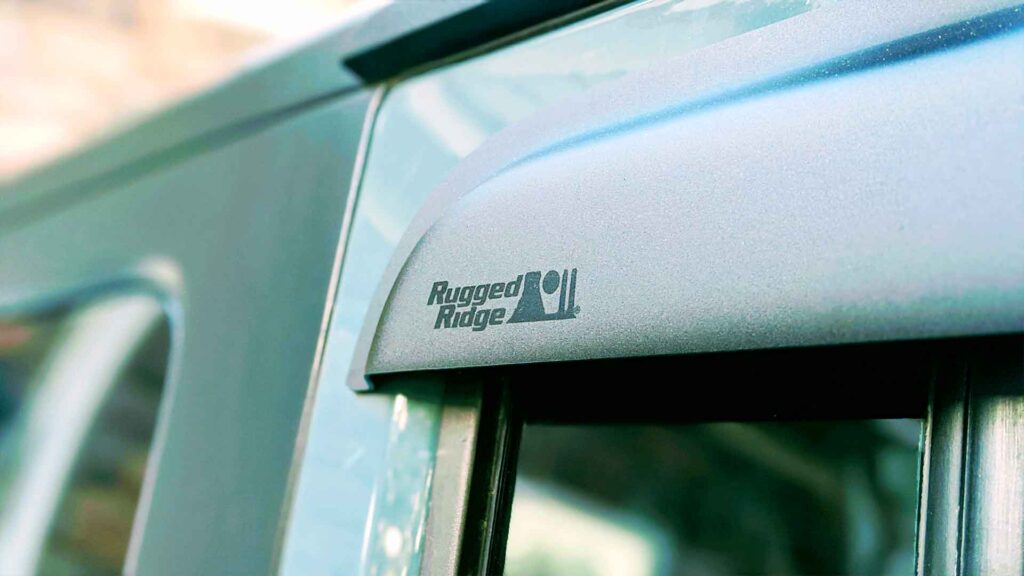
These Rugged Ridge Side Window Rain Deflectors look awesome on a Jeep Wrangler and do the job perfectly. They’re especially awesome since I sleep in my Jeep a lot, so I can keep the windows cracked open and keep some airflow, even in the rain.
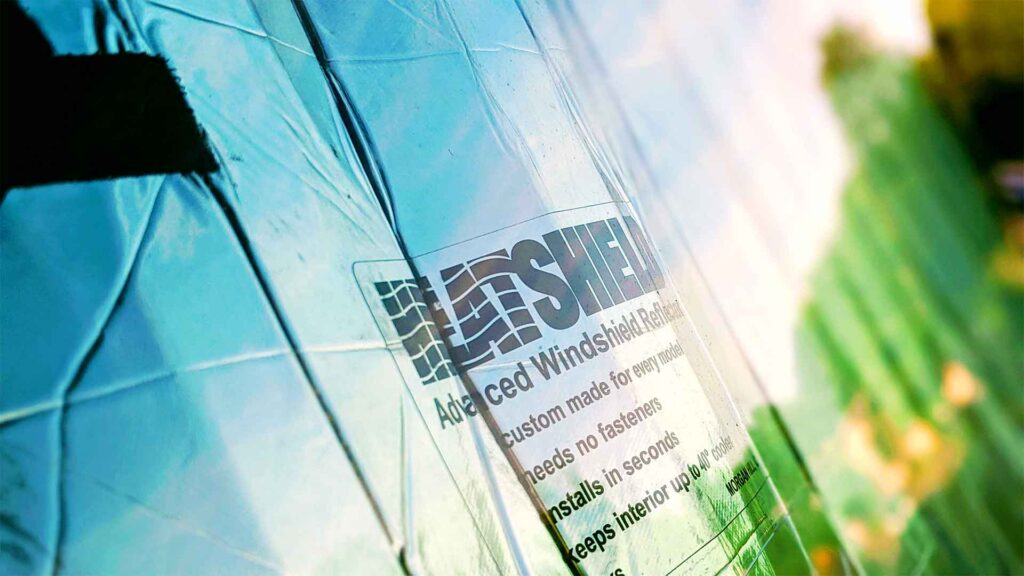
Two words: Custom Fit. Key for Jeep Wranglers since our windshields are so unique. Probably one of my most surprisingly good, kind of pricey jeep wrangler aftermarket accessories.
Connect & Share This Article
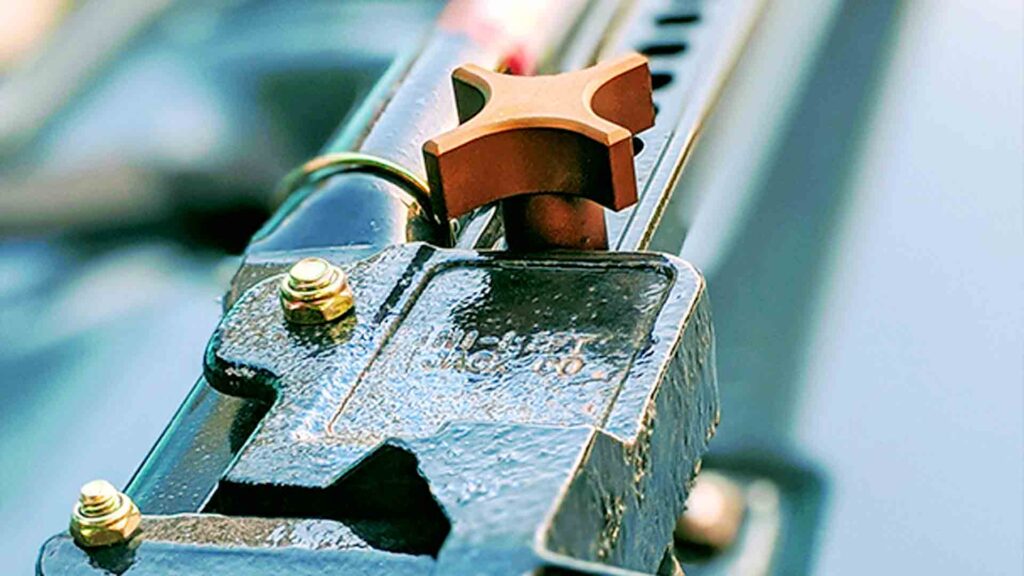
Insurance. It’s necessary, but hopefully you rarely have to use it. These Hi-lift Jacks not only work for jacking your shit up, but also as a as a winch if you’re in a pinch. Check out that hood mount kit here.
You can check out the whole article on Jeep Wrangler Parts & Accessories I recommend here.
How to Build This Custom Roof Rack Awning System – Measuring and Prep
Sorry to be a broken record, but this is really where your own specific measures come into play. Watch the video a couple of times just to see what I did, but then DIY your own specific measures!
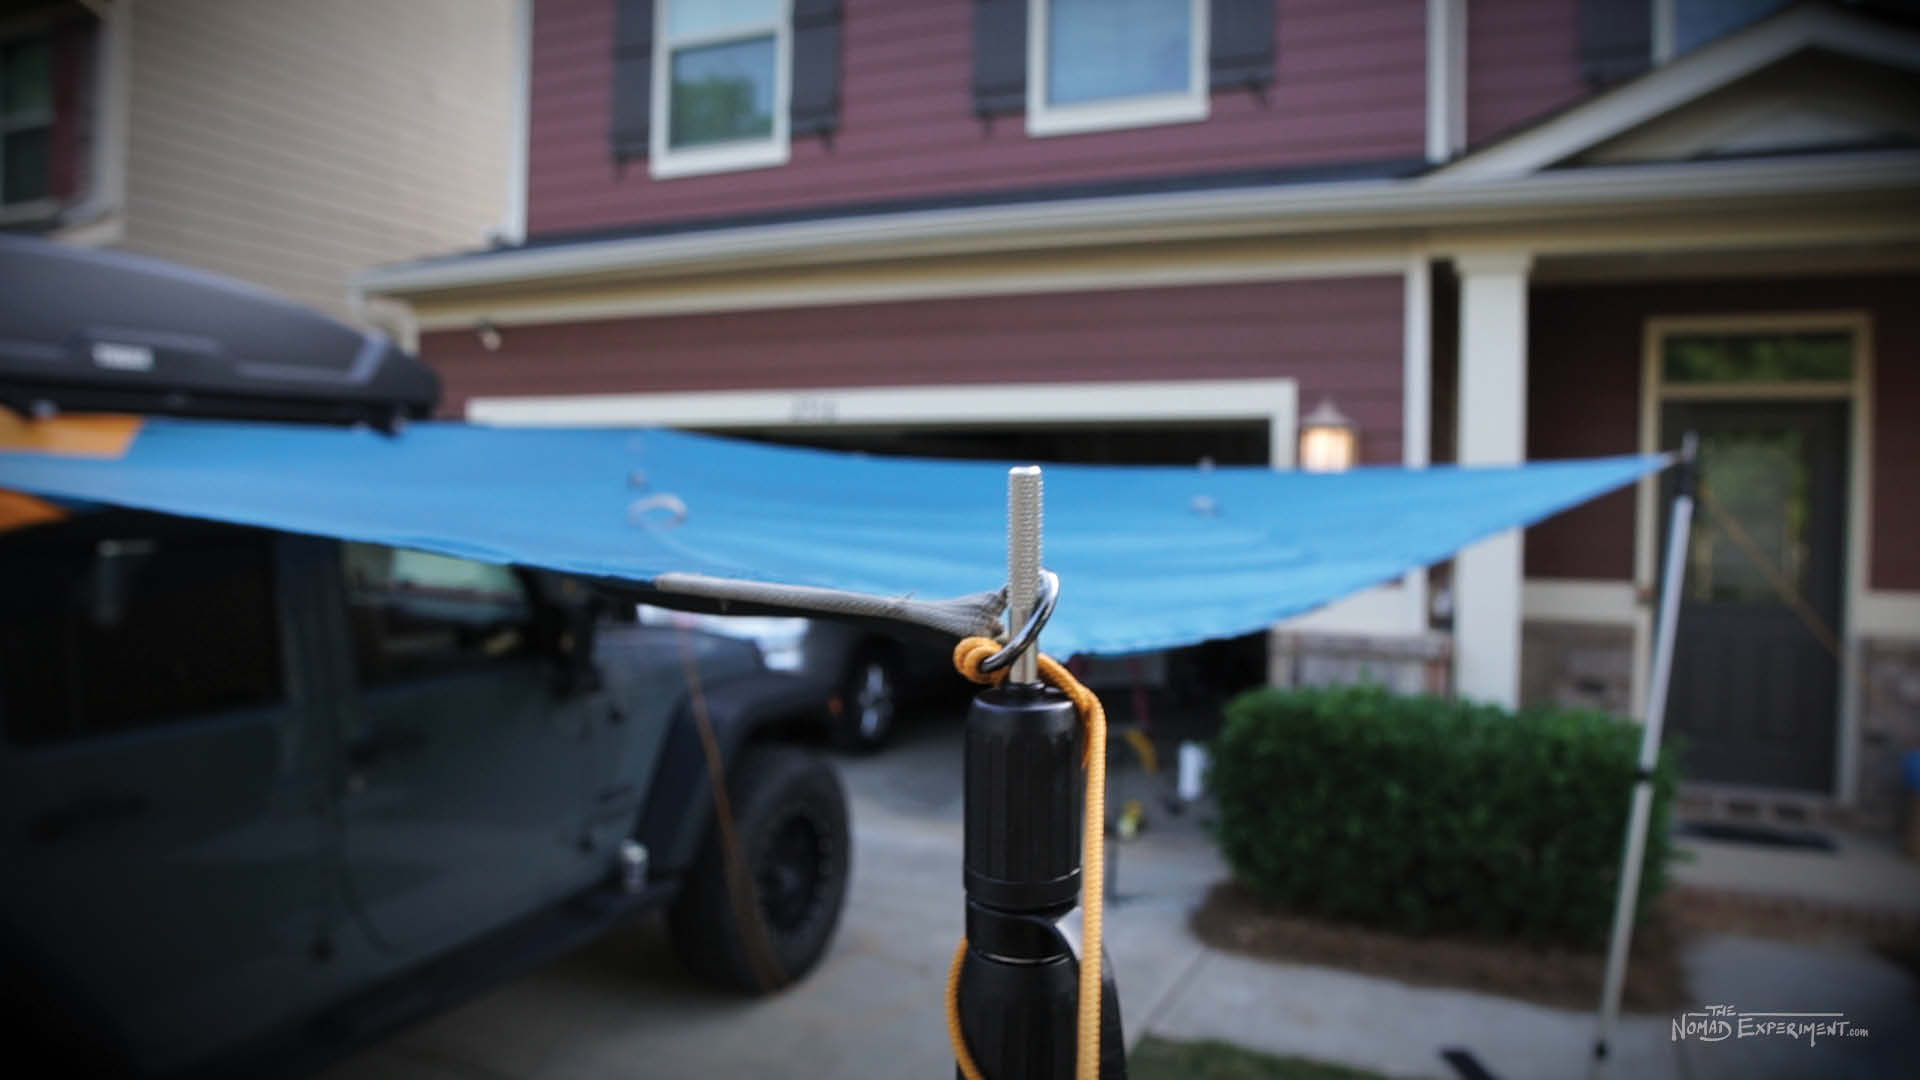
1. Make sure you know where you want the main roof rack tarp system bar to be mounted. This will not only affect what your roof rack looks like when it’s finished, but where your tarp will set when hooked up. I mounted mine knowing I wanted both my front and rear Jeep doors covered while centering on my Thule roof box and roof rack for aesthetics.
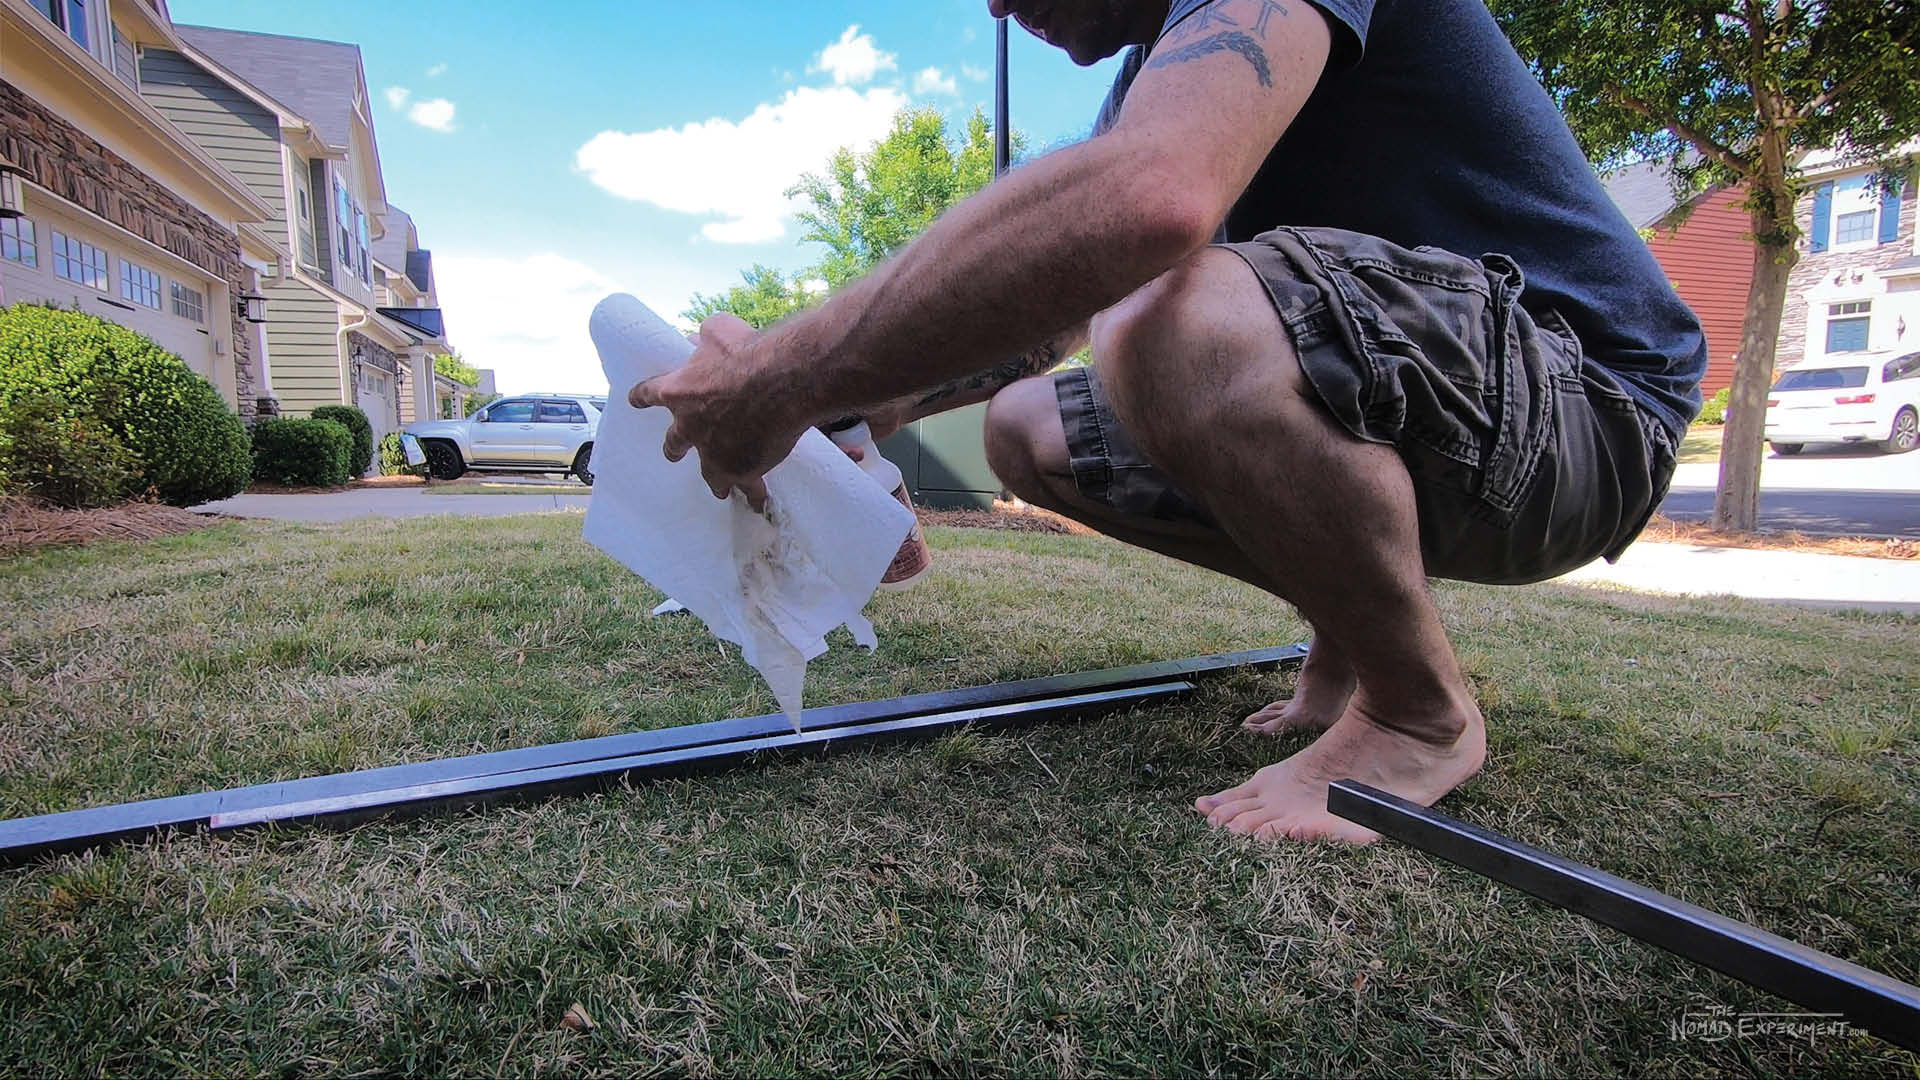
2. Lay out your tarp, pulled tight, and measure where your grommets or rings are. The outermost measures are where you want the ends of your .75 poles to end up and where you’ll add a connection point. I drilled a hole at the end of my rods and used S-biners, so I also needed to take into consideration the length of those S-biners.
I highly suggest you lay all of your awning telescoping tubes out with your tarp and hooks, etc., to get “real” measures before cutting or drilling anything!
3. Once you’ve marked on the main 1″ bar where it will connect with U-bolts on the roof rack, decide where your pin/bold needs to be to stop your .75″ telescoping bars at the proper length. Essentially, I just drilled a hole where that stopping bolt goes, cleaned, dropped Loctite, then manually screwed in the bold. You could go the extra mile and tap the whole, but I didn’t see the need.
Join the email list to stay in the loop on new releases!
Painting and Heat Shrinking
Once you’ve got all your holes drilled, etc., you can start painting all of your roof rack tarp/awning hardware. I highly suggest using a good cleaner on the steel before doing so, and even roughing it up with some high-grit sandpaper to bet better paint adhesion.
Do 2-3 coats and don’t rush it! (I know, my patience was severely tested here…) I suggest letting it dry overnight for the best longevity.
4. Spray paint all metal that will be visible, making sure to get inside of the telescoping metal tubes as well. I painted the U-bolt plates and the upper parts of the threads as well. Make sure all paint is well dried before moving on to any heat gun steps

5. Once your roof rack awning system hardware paint has fully dried, you can move on to using the heat shrink to seal and clean up connection points. Cut pieces of the 1.5″ to cover your stopping pin/bolt and slowly heat all parts equally and shrink it into place.
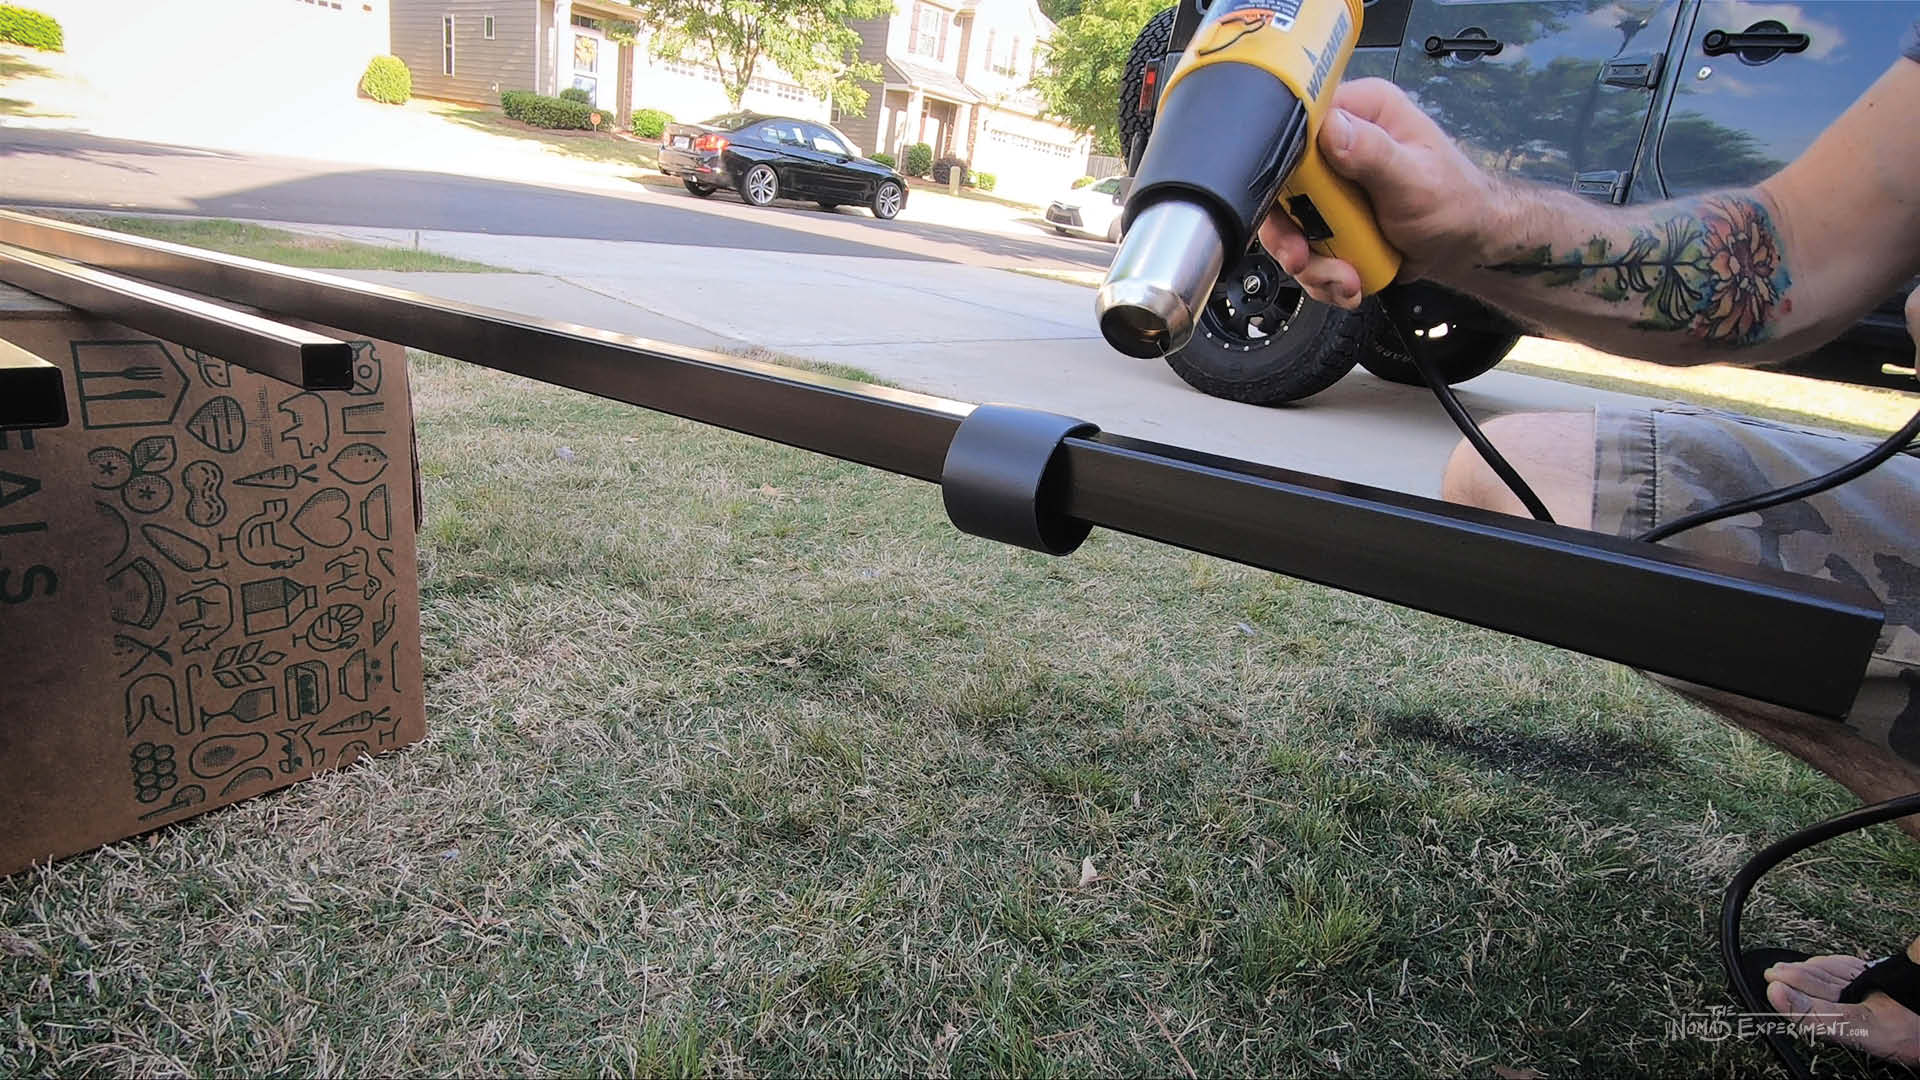

6. Cut pieces of the .75″ heat shrink to fit the upper part of the U-bolts and slide them on. It’s tough but doable. Then punch them into something to hold them up and shrink it up. Doesn’t shrink perfectly, but pretty close! The last bit of heat shrink will be used after installation of the roof rack awning system bar, on the U-bolt connections

Installation
7. Now that everything is painted and ready to go, position the main 1″ bar where you decided it should be fairly permanently installed on your roof rack. Drop your U-bolts over and install the main nuts with a drop or two of Loctite, making sure to tighten evenly.
8. Install washers and second lock-nuts to double up on those U-bolts.
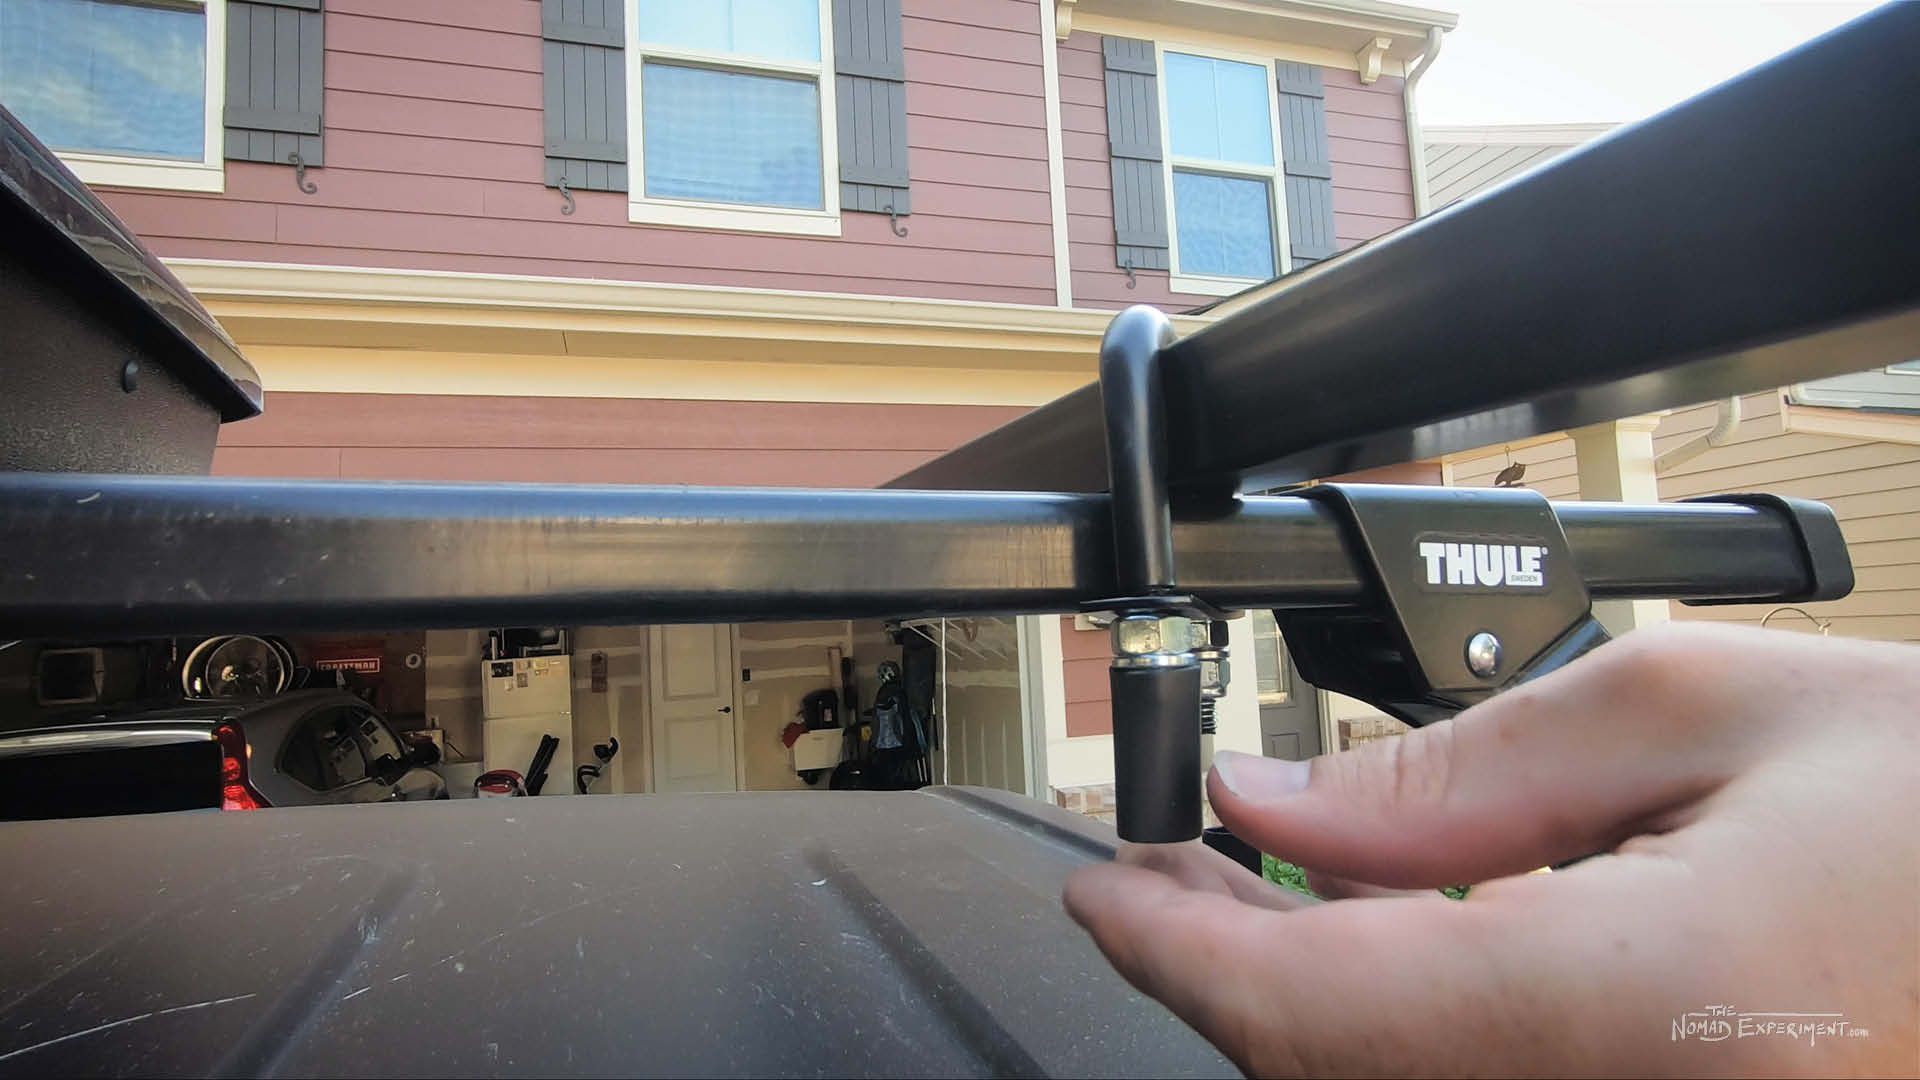
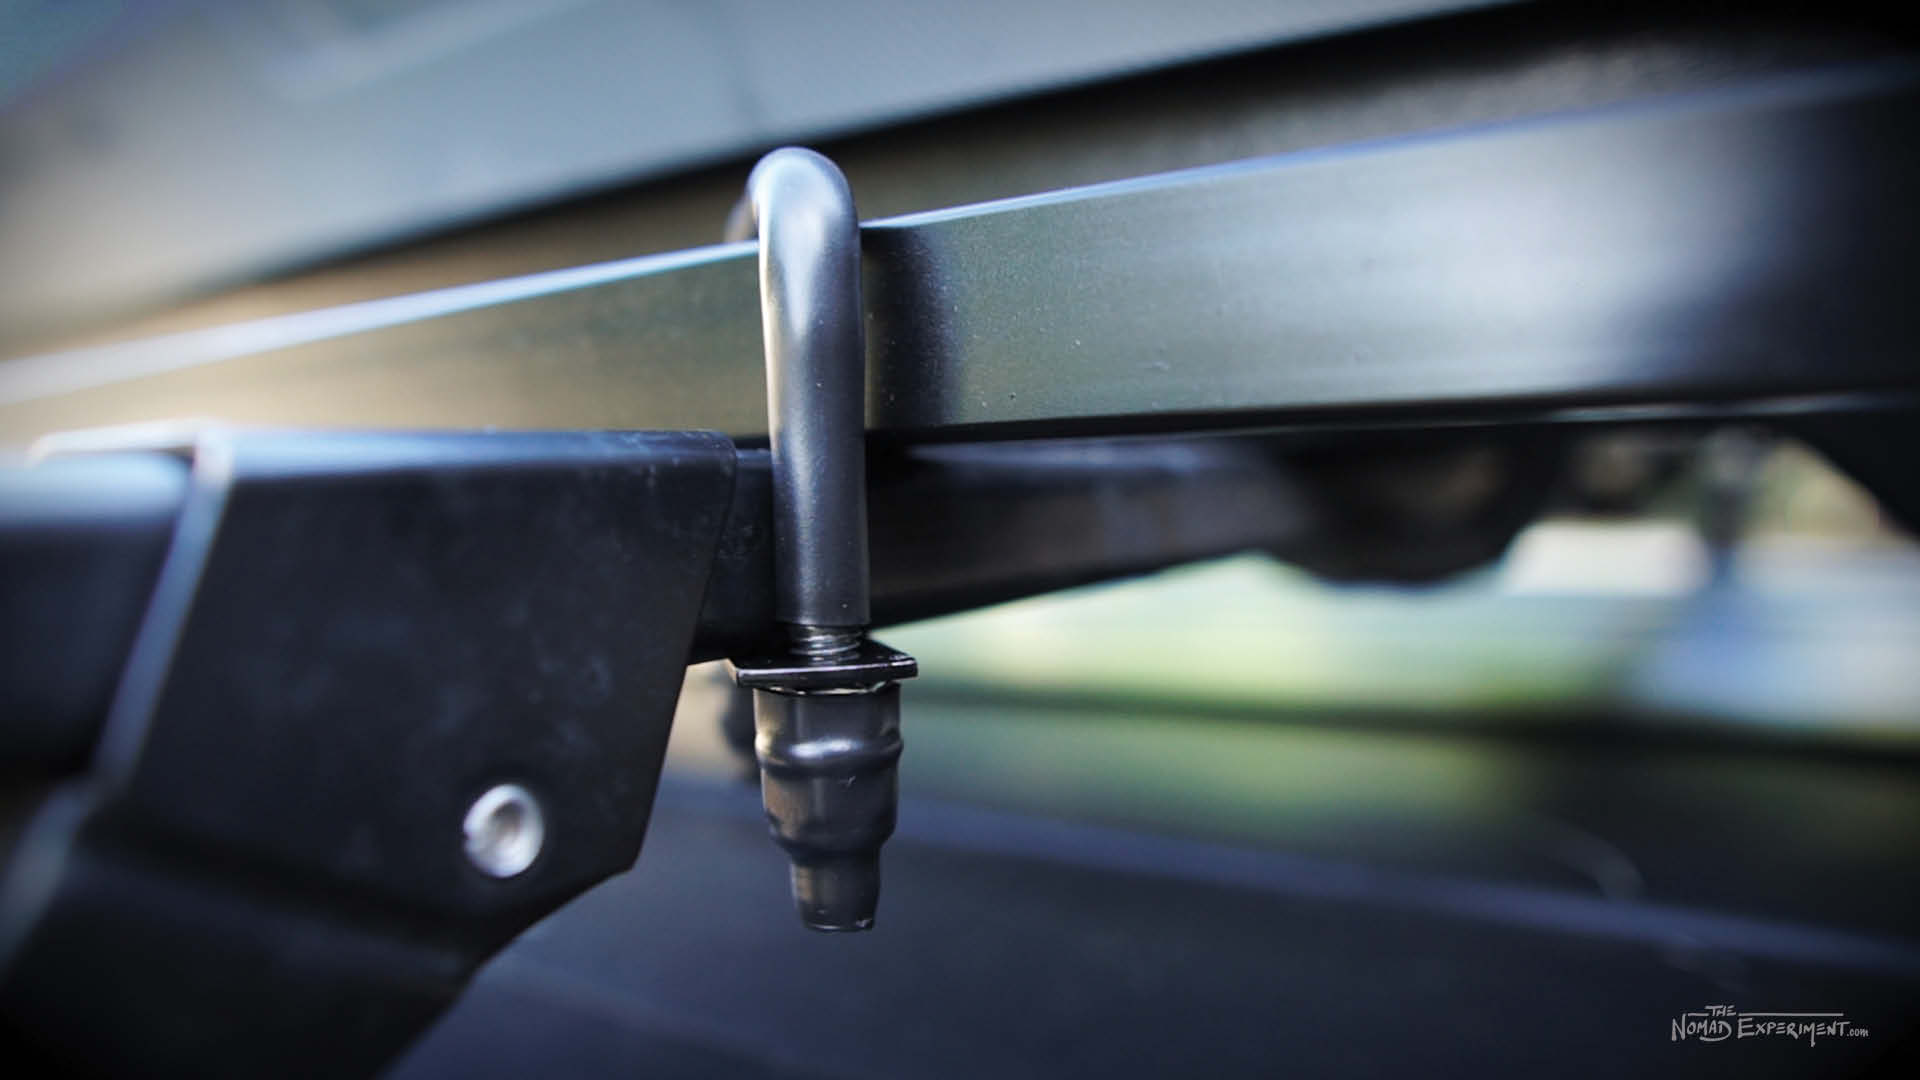
9. Moving any heat-sensitive things like your roof box or bike racks out of the way, heat shrink these exposed bolts. Hold the .75″ heat shrink up and measure pieces, then slide on and shrink. Trim off any excess you want to.
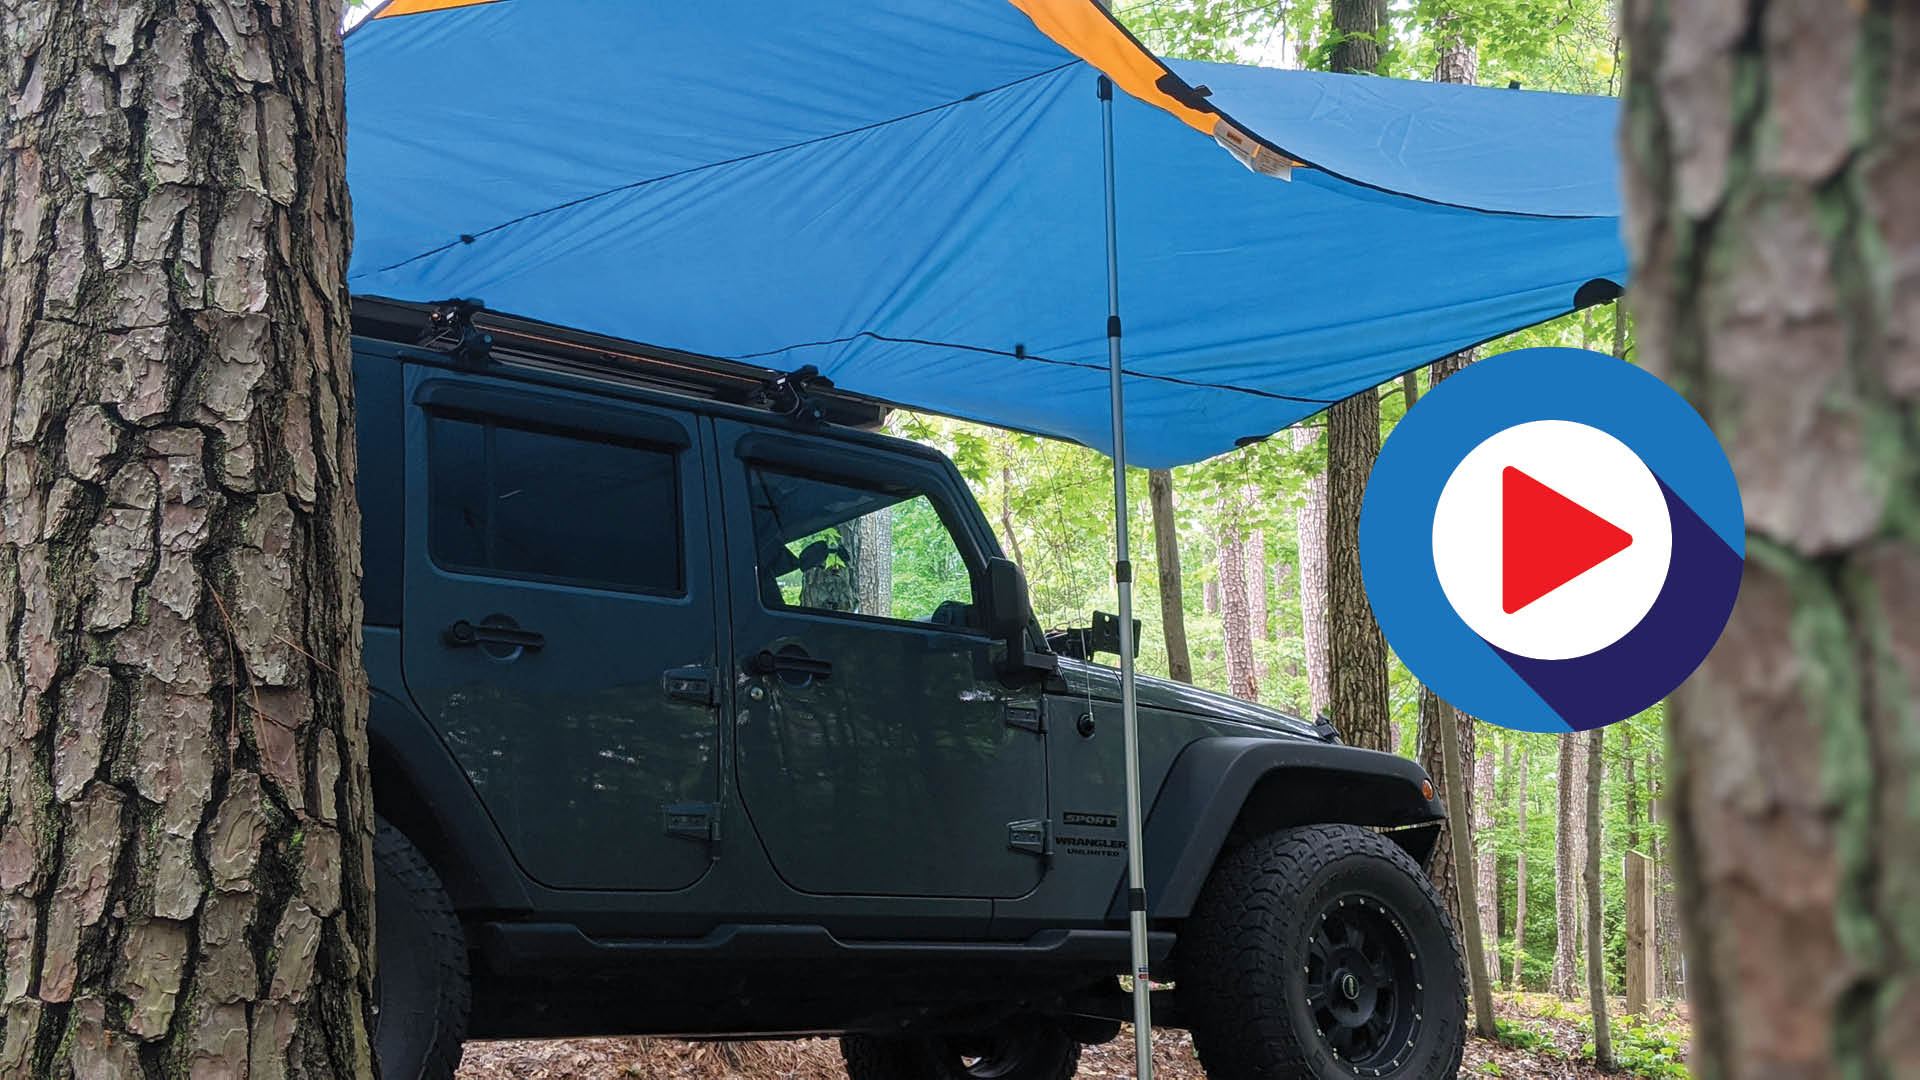
10. Slide your .75″ telescoping rod ends into the 1″ main tube and hook up your tarp! Use S-biners or whatever hooking means you want. Connect to a tree with guy lines or bungees, or use Aluminum Telescoping Poles if there aren’t trees or anything to hook your awning/tarp to.
Now sit back and enjoy a brewski and revel in your new, cheap, custom roof rack awning system!
Additional Thoughts & Suggestions
Again, you might be running an SUV or something other than a Jeep Wrangler, but I can only speak to my experience. But here are a few things to keep in mind:
How far “back” should you mount your main bar for your roof rack awning setup?
Where you mount your bar should be considered “permanent”, since you’re using Loctite and applying heat shrink over the connections. You’re kind of all-in there. I wanted my bar “deep enough” from the edge of my Jeep Wrangler JKU roof so that any water coming down would either be caught by the roof or the awning.
Essentially, the more the tarp overlaps the roof (or the deeper your bar), the less room there is for water to get under.
But the deeper you mount this, the more it might get in the way of extra roof rack components like bike racks, etc. So choose wisely!
Why did I stick with 9′? Couldn’t my custom roof rack tarp setup be longer?
I stuck with 9’ because I didn’t want too much cantilevered tension on those .75″ poles. They’re strong, but not so strong that I wanted to test it. The heavier the tarp, the more tension, etc.
Another reason I use the Kelty Noah’s Tarp, since they’re made out of really light yet water-repellent fabric. I can still use as large of a tarp as I want, just knowing that any extra length will need to attach to a tree or pole.
Do I really have to do all that heat shrinking on my custom roof rack awning setup?
Nope. Absolutely not. You do you. But I think that how “finished” this looks really lends to long-term satisfaction.
I can barely notice my bar or any of the mounting points because it blends in perfectly with the rest of the roof rack and my Jeep Wrangler.
Rust happens, which will be slowed down or at least hidden by the heat shrink. Vibration happens, and nuts work themselves loose. But that should be mitigated by heat shrink over those nuts and bolts. Again, you do you, but better safe than sorry in my opinion.
What if I didn’t want to permanently attach my custom roof rack awning bar to my vehicle? Could I just attach it when I want to use it?
Yep! I use my Jeep Wrangler JKU as my full-time overlanding vehicle, so the less I have to store inside or set up when hunkering down the better. But I guess you could simply use the same U-bolt and awning bar system outlined here and just attach yours as needed.
You could also just use some well-thought-out bungee connections at that rate. This might even give you more flexibility since you could choose which side of your rig works better in the moment. It also allows you to mount it deeper on the vehicle depending on what’s on, or not on your roof rack at the time.
Connect & Share This Article
Hope You Got Some Good Ideas! Appreciate The Shares!
Thanks for checking this out and I hope you got some ideas. Whether you’re putting your custom roof rack awning system on a Jeep Wrangler or any other SUV, it should get you started! And if you want to see more about how I use my Jeep to overland, check out some of these links or articles.

Cheers!
– Jason
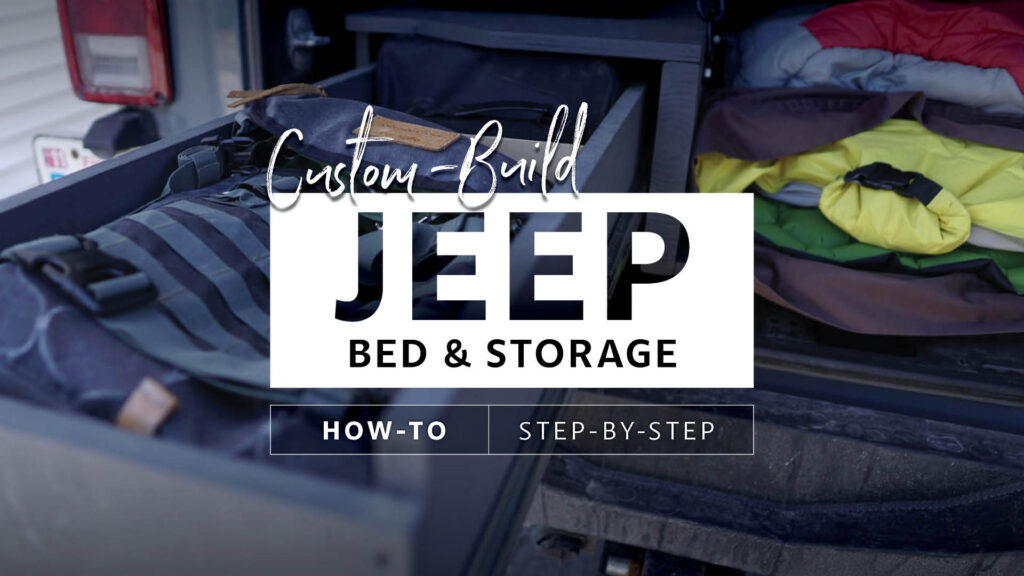
READ NEXT: Sleep in A Jeep Wrangler!? JKU Bed Platform & Storage STEP BY STEP HOW TO BUILD it!
Jeep Wrangler Upgrades & Accessories to Make Your Jeep Life Fun as Hell!


About Jason Robinson
Jason is the author of “The Beginner Traveler’s Guide” as well as the voice behind the words and the eye behind the lens for The Nomad Experiment. “Planning to travel at some point” wasn’t actually getting the job done, so nearing 40 he decided to make it a priority, nomatter how scary that was. A few years later—through the pandemic and a type 1 diabetes diagnosis at age 42—now living a life of nomadic travel, he’s speaking out to encourage others of any age, or with any serious medical diagnosis, to live an unconventional life.
Travel Planning Tips
Figure out where you are going & how are you getting there…
I suggest using at least 2 to 3 different travel search sites. Start with Skyscanner or Orbitz or Booking …or whatever aggregator site you prefer. Then when you see what airlines to use, check their respective sites for better deals or rewards flights.
Figure out where you’re going to stay…
If you’re interested in hostels, search Hostelworld or Hostelling International. For longer-term or more private digs, look at Airbnb, VRBO, colivings, or you can look for hotel rooms in the links from the search engines listed above.
Get comprehensive travel insurance, or in the least, travel medical insurance if internationally…
Especially with COVID not going anywhere, you need travel medical insurance nomatter what! Start with an insurance aggregator or with SafetyWing, World Nomads, or another. Then decide what is important to you; trip cancellation, baggage coverage, medical, or all of the above. And get a yearly evacuation plan, since you’ll have to get home after your emergency!
Need more resources? Click here!